Whipped Strawberry Tart Recipe
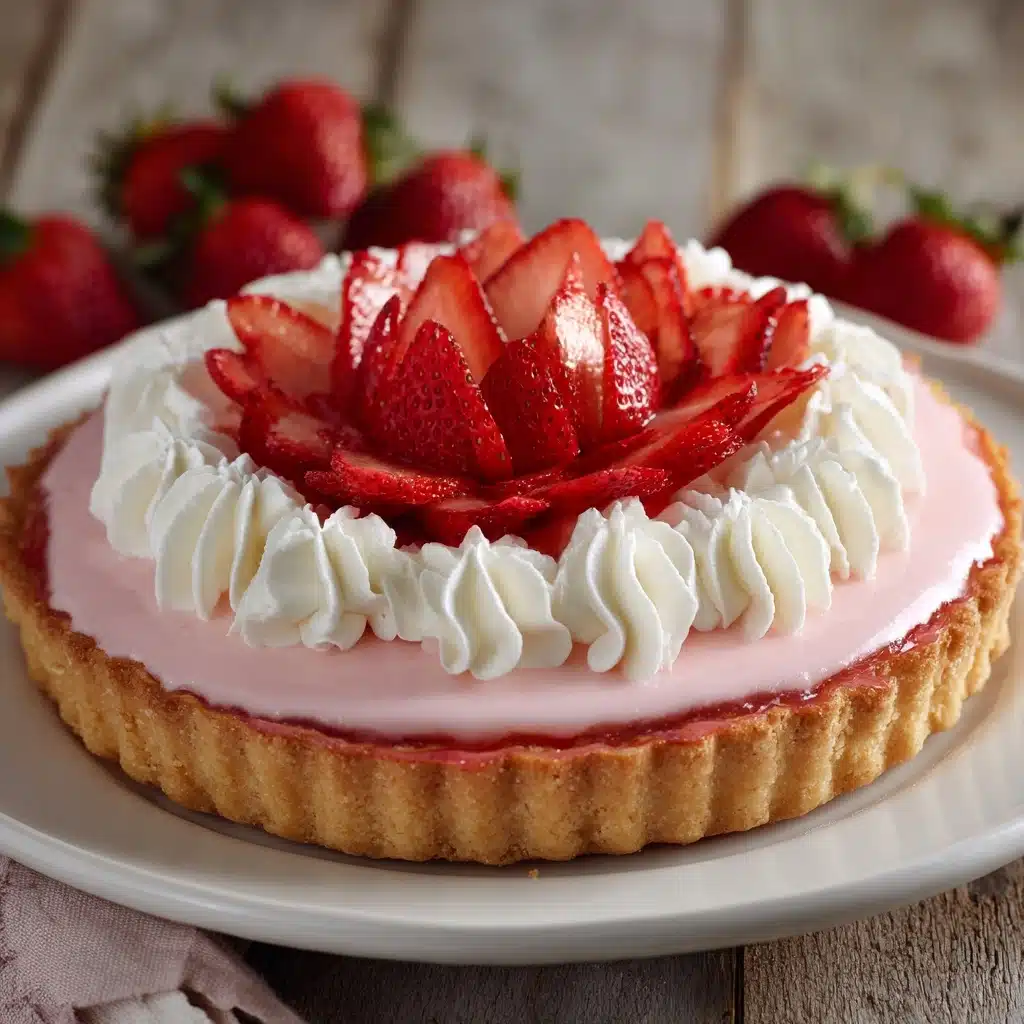
If you’re searching for a show-stopping dessert that’s as easy as it is impressive, look no further than this Whipped Strawberry Tart. A luscious cloud of whipped cream and tangy cream cheese fills a buttery tart shell, all crowned with a vibrant layer of fresh strawberries. Each bite celebrates the sweetness of ripe berries and the richness of the creamy filling, making it a perfect choice for spring gatherings, summer barbecues, or any time you want to savor something special.
Ingredients You’ll Need
Every ingredient in this Whipped Strawberry Tart brings something essential to the table—whether it’s creaminess, sweetness, or a pop of color. You’ll only need a handful of everyday items, but each one works its magic to create a dessert that’s so much greater than the sum of its parts!
- Tart shell: Start with a 9-inch pre-baked tart shell for ease and a sturdy, crisp base that holds up to the creamy filling.
- Cream cheese: Use 8 ounces of softened cream cheese to add tang and richness to the whipped filling.
- Powdered sugar: Half a cup sweetens the filling smoothly, dissolving effortlessly into the cream cheese.
- Vanilla extract: Just a teaspoon rounds out the flavors and adds a lovely warmth to the cream mixture.
- Heavy whipping cream: One cup whipped to fluffy peaks lends lightness and a silky texture to the tart.
- Granulated sugar: Two tablespoons help stabilize and lightly sweeten the whipped cream.
- Fresh strawberries: Two cups, hulled and sliced, provide a juicy, colorful topping that’s the star of the show.
- Mint leaves (optional): A few sprigs make a beautiful, fresh garnish for that extra-special finish.
How to Make Whipped Strawberry Tart
Step 1: Prepare the Cream Cheese Mixture
Begin by placing the softened cream cheese, powdered sugar, and vanilla extract in a large mixing bowl. Beat these together until the mixture is completely smooth, creamy, and free of lumps. It should look glossy and light, which sets the stage for a luxuriously velvety filling.
Step 2: Whip the Cream
In a separate clean bowl, pour in the heavy whipping cream and sprinkle in the granulated sugar. Use a hand mixer or stand mixer to beat the cream until stiff peaks form. You’ll know it’s ready when you lift the beaters and the cream holds its shape without collapsing.
Step 3: Combine and Fold
Gently fold the whipped cream into the cream cheese mixture. Take your time with this step—use a wide spatula and a soft hand to avoid deflating all that lovely air you just whipped in. The goal is a light, pillowy filling with no streaks left behind.
Step 4: Fill the Tart Shell
Spoon the creamy mixture into your pre-baked tart shell. Smooth the top with an offset spatula or the back of a spoon, spreading the filling right to the edges so every slice gets its fair share of deliciousness.
Step 5: Top with Strawberries
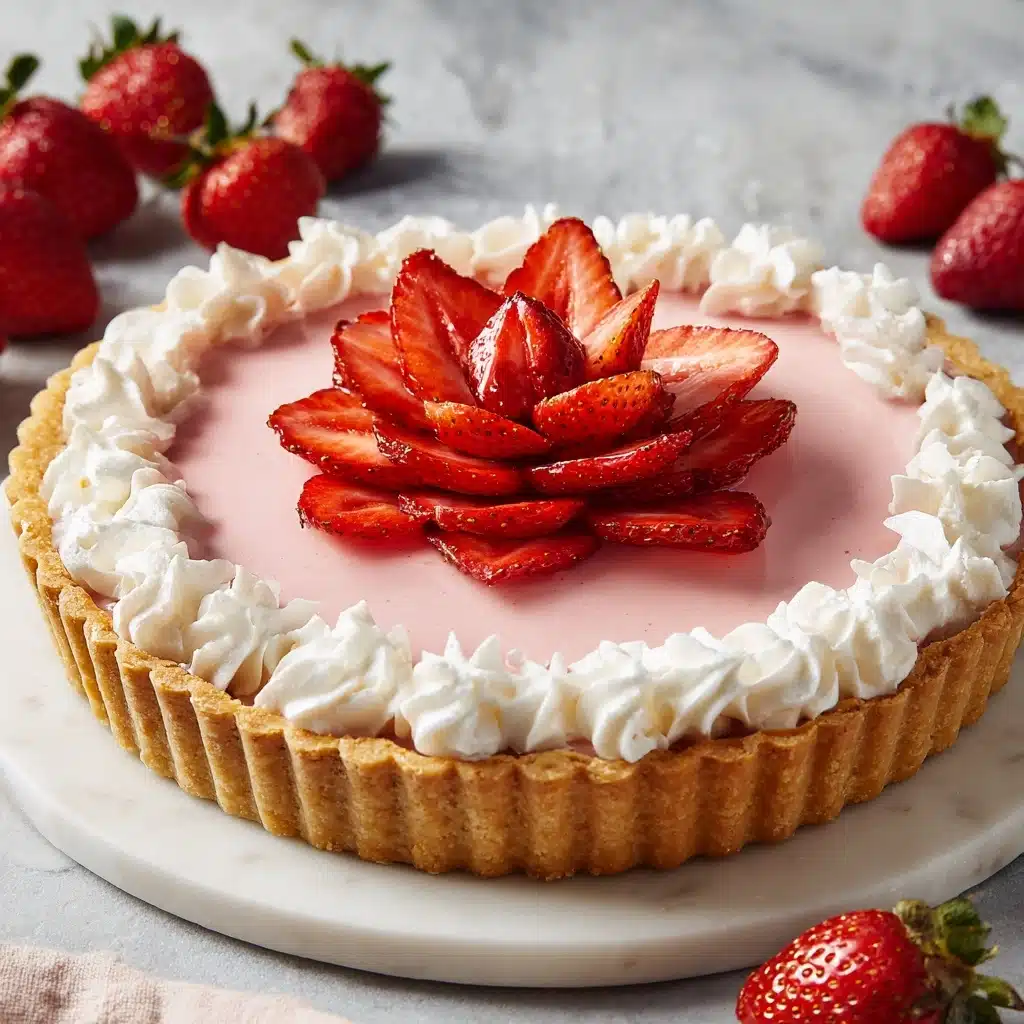
Arrange the sliced strawberries over the surface in any pattern you like—spirals, concentric circles, or just a generous mound. The color contrast is stunning, and the berries add a juicy pop to every bite of Whipped Strawberry Tart.
Step 6: Chill and Garnish
Refrigerate the tart for at least one hour to let the filling set and the flavors meld. Just before serving, add mint leaves if desired for a fresh, fragrant finish that’s as pretty as it is tasty.
How to Serve Whipped Strawberry Tart
Garnishes
Garnishing your Whipped Strawberry Tart can take it from lovely to unforgettable. A few mint leaves offer a refreshing aroma and a beautiful color contrast. For a festive touch, consider a drizzle of melted chocolate or a brush of fruit glaze to make the strawberries glisten and taste even sweeter.
Side Dishes
This tart is delightful on its own, but if you want to create a full dessert spread, try serving it with a scoop of vanilla bean ice cream or a dollop of freshly whipped cream. A crisp glass of sparkling wine or a cup of fragrant herbal tea makes a perfect pairing for a truly memorable treat.
Creative Ways to Present
For parties, slice the Whipped Strawberry Tart into bite-sized bars or squares and arrange them on a platter for easy grabbing. Or, use mini tart shells and create individual tarts for a charming, personalized touch. No matter how you serve it, this dessert will always steal the spotlight!
Make Ahead and Storage
Storing Leftovers
If you happen to have leftovers (though that’s never a guarantee!), cover the tart tightly with plastic wrap or store in an airtight container in the refrigerator. It will stay fresh for up to two days, though the crust is best enjoyed while still crisp.
Freezing
While the filling of Whipped Strawberry Tart can be frozen, the fresh strawberries may lose their texture after thawing. If you’d like to freeze the tart, do so without the berries, wrapping the tart well. Add fresh strawberries after defrosting for the best result.
Reheating
This tart is meant to be served chilled, so there’s no need to reheat. If you like, simply let it sit at room temperature for 10–15 minutes to take the chill off before serving, which brings out the flavors even more.
FAQs
Can I use frozen strawberries instead of fresh?
Frozen strawberries tend to release extra moisture and can become mushy after thawing, which may affect the tart’s texture. For the prettiest presentation and best flavor, fresh strawberries are highly recommended for your Whipped Strawberry Tart.
What if I don’t have a tart shell?
If you’re in a pinch, you can use a graham cracker crust or even make individual parfaits by layering the filling and strawberries in small glasses. The combination of flavors will still shine!
Can I prepare the tart in advance?
Absolutely! You can make the filling and assemble the tart up to a day ahead. Just wait to add the fresh strawberries until a few hours before serving to keep them looking vibrant and fresh.
Is there a dairy-free alternative?
You can swap in dairy-free cream cheese and coconut cream (whipped) to create a vegan version of Whipped Strawberry Tart. The flavor will be slightly different, but still delicious and creamy.
How do I prevent my tart crust from getting soggy?
To keep your crust crisp, make sure it’s completely cool before adding the filling, and don’t overfill with juicy strawberries. Serving the tart the same day it’s made also helps maintain the perfect texture.
Final Thoughts
If you’re craving a dessert that’s as beautiful as it is delicious, the Whipped Strawberry Tart is a must-try. It’s easy enough for a weeknight treat but elegant enough for your most special occasions. Gather your ingredients, invite a friend or two, and let this irresistible tart bring a little extra joy to your table!
Print
Whipped Strawberry Tart Recipe
- Total Time: 1 hour 15 minutes
- Yield: 8 servings 1x
- Diet: Vegetarian
Description
This Whipped Strawberry Tart is a delightful no-bake dessert featuring a creamy, smooth cream cheese and whipped cream filling nestled in a pre-baked tart shell, topped with fresh sliced strawberries. Perfect for strawberry lovers, it combines sweet, tangy, and creamy flavors with an elegant presentation that’s simple to prepare and sure to impress.
Ingredients
For the Filling
- 8 ounces cream cheese, softened
- 1/2 cup powdered sugar
- 1 teaspoon vanilla extract
- 1 cup heavy whipping cream
- 2 tablespoons granulated sugar
For the Tart and Topping
- 1 9-inch pre-baked tart shell
- 2 cups fresh strawberries, hulled and sliced
- Optional: mint leaves for garnish
Instructions
- Prepare the cream cheese mixture: In a large bowl, beat the softened cream cheese, powdered sugar, and vanilla extract together until the mixture is smooth and creamy, ensuring there are no lumps.
- Whip the cream: In a separate bowl, whip the heavy whipping cream with the granulated sugar until stiff peaks form, indicating firm, stable whipped cream.
- Combine mixtures: Gently fold the whipped cream into the cream cheese mixture using a spatula until fully combined, taking care to maintain the airy texture.
- Fill the tart shell: Spread the combined cream mixture evenly into the pre-baked tart shell, smoothing the top with a spatula.
- Arrange strawberries: Decoratively arrange the sliced fresh strawberries on top of the cream filling in any desired pattern.
- Chill the tart: Place the tart in the refrigerator and chill for at least 1 hour to allow the filling to set and the flavors to meld.
- Garnish and serve: Optionally garnish with fresh mint leaves before serving chilled. Enjoy this fresh and creamy dessert!
Notes
- For extra flavor, lightly macerate the strawberries with a teaspoon of sugar for 10-15 minutes before arranging them on the tart.
- You can drizzle melted chocolate or a fruit glaze over the top for a festive presentation.
- This tart is best served chilled on the day it is made to maintain freshness and texture.
- Use fresh, ripe strawberries for the best taste and appearance.
- Prep Time: 15 minutes
- Cook Time: 0 minutes
- Category: Dessert
- Method: No-Bake
- Cuisine: American
Nutrition
- Serving Size: 1 slice
- Calories: 320
- Sugar: 28g
- Sodium: 120mg
- Fat: 22g
- Saturated Fat: 14g
- Unsaturated Fat: 6g
- Trans Fat: 0g
- Carbohydrates: 28g
- Fiber: 2g
- Protein: 5g
- Cholesterol: 55mg


