Melted Witch Cookies Recipe
If you’re searching for the ultimate whimsical treat to bring a little magic to your Halloween festivities, look no further than this Melted Witch Cookies Recipe. Each cookie is a playful combination of soft sugar cookie, gooey green icing, and an adorable witch hat crafted from chocolate, making them irresistibly fun for kids and adults alike. With just a handful of pantry staples and a splash of creativity, you’ll have a batch of showstopping cookies that look as enchanting as they taste. Get ready for giggles, smiles, and plenty of “wow, how did you make these?” at your next gathering.
Ingredients You’ll Need
-
Sugar Cookies:
- 1 package (16–18 oz) refrigerated sugar cookie dough (or homemade)
Green Icing:
- 1 1/2 cups powdered sugar
- 1–2 tablespoons milk
- 1/4 teaspoon vanilla extract
- Green food coloring
Decorations:
- 12 chocolate kisses
- 12 chocolate wafer cookies or mini fudge-striped cookies
- Assorted sprinkles or candy eyes
- Black or orange gel icing (optional)
How to Make Melted Witch Cookies Recipe
Step 1: Prepare and Bake the Cookies
Preheat your oven to 350°F (175°C) and line a baking sheet with parchment paper to keep cleanup easy. Slice the refrigerated sugar cookie dough into 12 even pieces and space them apart on the tray — these need room to spread! Bake for 10 to 12 minutes, just until you see the edges set, leaving the centers a bit soft for that delightful chew. Let them cool completely so the icing doesn’t slide right off.
Step 2: Mix the Green Icing
In a medium bowl, whisk together the powdered sugar, milk, vanilla extract, and several drops of green food coloring. You’re aiming for a smooth, pourable consistency — thin enough that it can be spooned in puddles, but thick enough to not run straight off the edge. Adjust with more milk or powdered sugar as needed, and tweak the green until it suits your witchy vision!
Step 3: Decorate with Witchy Flair
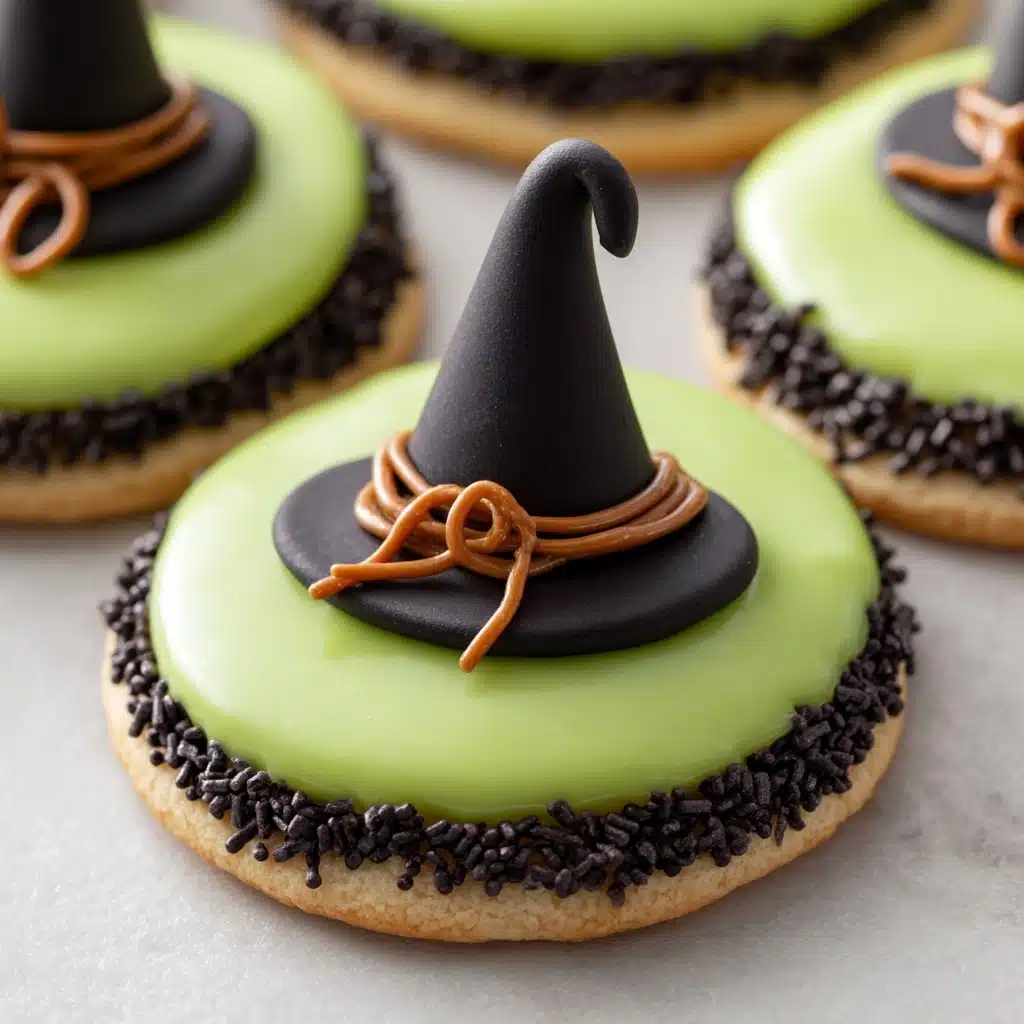
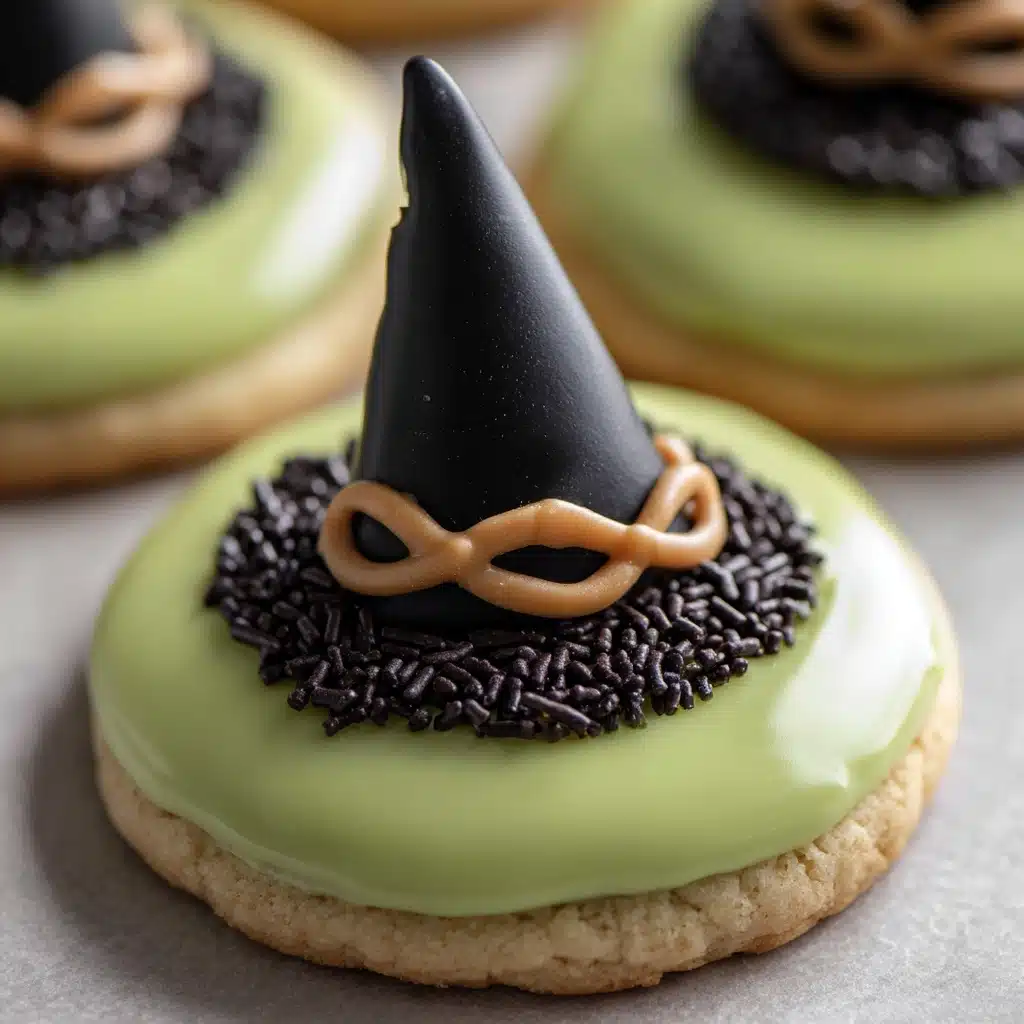
Spoon the green icing generously over each cooled cookie to create that unmistakable melted witch puddle effect. Quickly top with a chocolate wafer (or fudge-striped cookie) to serve as the brim of the hat, then crown each with a chocolate kiss pressed gently in the center. That’s your witch hat, ready for its star moment! Add candy eyes and sprinkles right away, before the icing sets.
Step 4: Add Faces and Fun Details
If you want to get extra creative, now’s the time for gel icing! Dot on little smiles, eyebrows, or a classic Halloween hat band around the chocolate kiss. Each cookie develops its own personality — from silly to spooky — making the decorating process as much fun as the eating part.
Step 5: Let the Icing Set
Allow the finished cookies to rest at room temperature for at least 20 minutes. The icing will set up a bit, keeping the decorations secure and making these treats much easier to handle. Now you’re ready to wow your family or your party guests with your Melted Witch Cookies Recipe!
How to Serve Melted Witch Cookies Recipe
Garnishes
Finish your Melted Witch Cookies Recipe with a flourish! Besides the classic candy eyes and sprinkles, try edible glitter for a magical sparkle, or a dusting of cocoa powder for a bewitching shadow. Let kids swirl extra colored icing or add themed edible confetti for maximum whimsy.
Side Dishes
Serve the cookies alongside mugs of hot cocoa, apple cider, or spooky punch for a cozy and festive treat table. If you’re making a dessert spread, consider pairing them with other Halloween favorites like caramel apples, popcorn balls, or mini cupcakes for a full-on fright-night feast.
Creative Ways to Present
Arrange the cookies on a black cake stand or a vibrant Halloween platter with dry ice fog drifting around for that extra touch of drama. Wrap each treat in cellophane with a little ribbon for party favors, or let guests decorate their own as a hands-on party activity.
Make Ahead and Storage
Storing Leftovers
Keep your finished Melted Witch Cookies Recipe fresh by storing cookies in a single layer in an airtight container at room temperature. They’ll stay soft and magical for up to three days — perfect for prepping ahead of your party.
Freezing
If you want to get a jump on your Halloween baking, you can freeze the plain sugar cookies before decorating. Once cooled, tuck them into freezer bags with parchment between the layers; they’ll keep well for up to two months. Decorate with icing and candy once you’re ready to serve.
Reheating
These cookies are best enjoyed at room temperature, but if you’ve frozen the cookies (without icing), thaw them on the counter for about an hour. Wait to add the icing and decorations until after they’re defrosted, so everything stays bright, fresh, and fun.
FAQs
Can I use homemade sugar cookie dough for the Melted Witch Cookies Recipe?
Absolutely! This recipe works just as well with your favorite homemade sugar cookie dough. Just shape and bake them as directed, then follow the decorating steps. Homemade dough adds a personal touch and can even let you control the flavor and texture.
What kind of food coloring works best to get vibrant “witch green” icing?
Gel-based food coloring is your best bet for deep, vivid shades without watering down the icing. Start with a small amount and add more drop by drop until you achieve that bright green worthy of the spookiest witches.
Can the Melted Witch Cookies Recipe be made gluten-free?
Yes, swap in your favorite gluten-free sugar cookie dough and double-check all decorations (like wafer cookies and candy) for gluten-free certification. The decoration process stays exactly the same, so everyone can enjoy these magical treats.
How can I safely involve kids in making these cookies?
Kids will love decorating the cookies with icing and candy eyes! Let adults handle the baking and any cutting, then turn the decorating into a family art project, providing small bowls of toppings and letting imaginations run wild.
What’s the best way to transport Melted Witch Cookies to a party?
Arrange cookies in a single layer in a sturdy, flat container. Place a layer of parchment or wax paper between cookies if you need to stack — but avoid stacking decorated cookies if possible to keep the hats intact. Once you arrive, assemble the display for a magical reveal!
Final Thoughts
Whether you’re baking for a Halloween bash, a classroom party, or just want to bring a bit of enchantment to your week, the Melted Witch Cookies Recipe is pure joy in cookie form. Why not gather your favorite people and enjoy the laughter and creativity that comes with every batch? Make them your signature Halloween treat — and watch them disappear as quickly as you can say “wicked good!”
Print
Melted Witch Cookies Recipe
- Total Time: 32 minutes
- Yield: 12 cookies 1x
- Diet: Vegetarian
Description
These Melted Witch Cookies are a whimsical and delightful treat for Halloween or any spooky-themed party. They are easy to make using sugar cookie dough and simple decorations to create cute witch faces on each cookie. Kids and adults alike will enjoy these fun and tasty treats.
Ingredients
Sugar Cookies:
- 1 package (16–18 oz) refrigerated sugar cookie dough (or homemade)
Green Icing:
- 1 1/2 cups powdered sugar
- 1–2 tablespoons milk
- 1/4 teaspoon vanilla extract
- Green food coloring
Decorations:
- 12 chocolate kisses
- 12 chocolate wafer cookies or mini fudge-striped cookies
- Assorted sprinkles or candy eyes
- Black or orange gel icing (optional)
Instructions
- Preheat the oven: Heat the oven to 350°F (175°C) and line a baking sheet with parchment paper.
- Prepare the cookies: Slice the sugar cookie dough, place on the baking sheet, and bake for 10-12 minutes until set. Let cool.
- Make the green icing: Mix powdered sugar, milk, vanilla, and green food coloring until smooth.
- Decorate the cookies: Spoon green icing over each cookie, add chocolate wafer as hat brim, press a chocolate kiss on top, and decorate with sprinkles or candy eyes.
- Set and serve: Allow the icing to set before serving.
Notes
- For a homemade touch, use your favorite sugar cookie recipe.
- Let kids decorate their own cookies for a fun Halloween activity.
- Store in an airtight container at room temperature for up to 3 days.
- Prep Time: 20 minutes
- Cook Time: 12 minutes
- Category: Dessert
- Method: Baking
- Cuisine: American
Nutrition
- Serving Size: 1 cookie
- Calories: 210
- Sugar: 20g
- Sodium: 140mg
- Fat: 9g
- Saturated Fat: 4g
- Unsaturated Fat: 4g
- Trans Fat: 0g
- Carbohydrates: 31g
- Fiber: 0g
- Protein: 2g
- Cholesterol: 10mg


