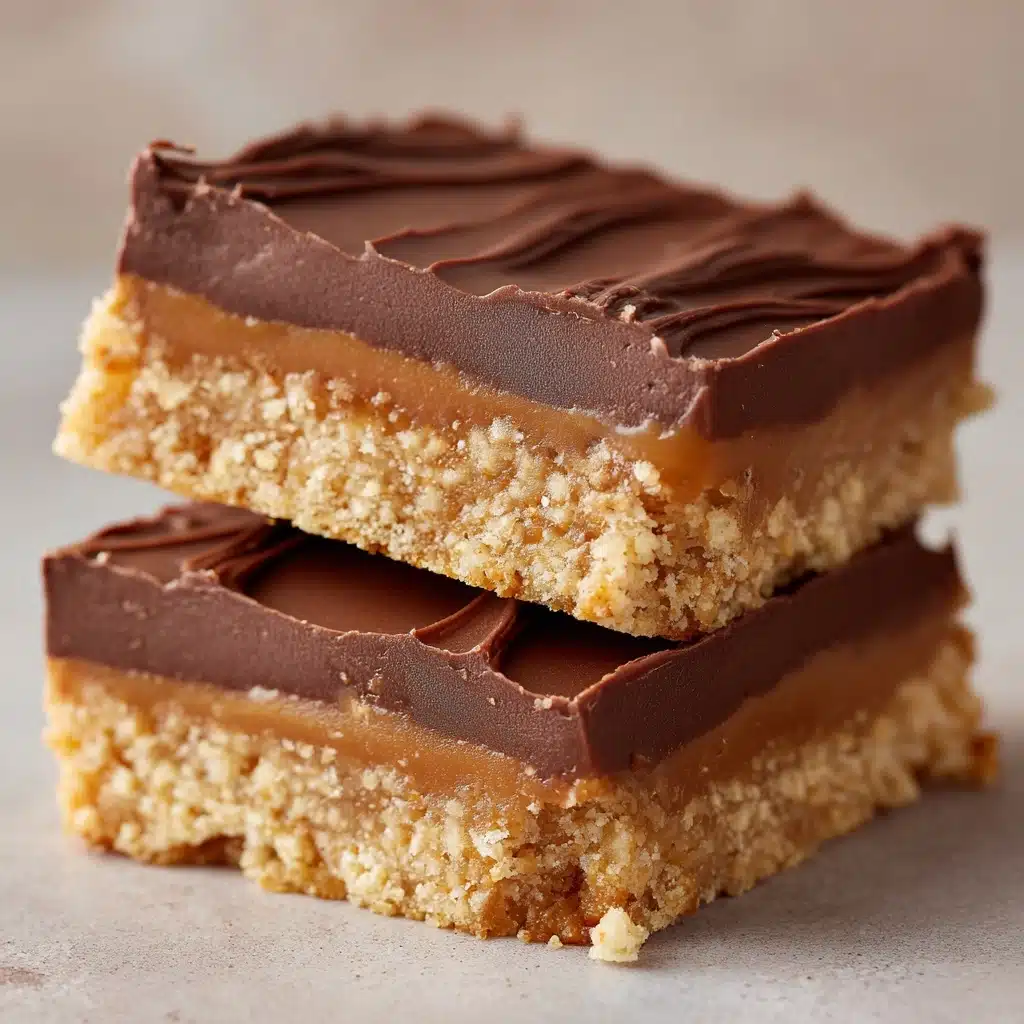
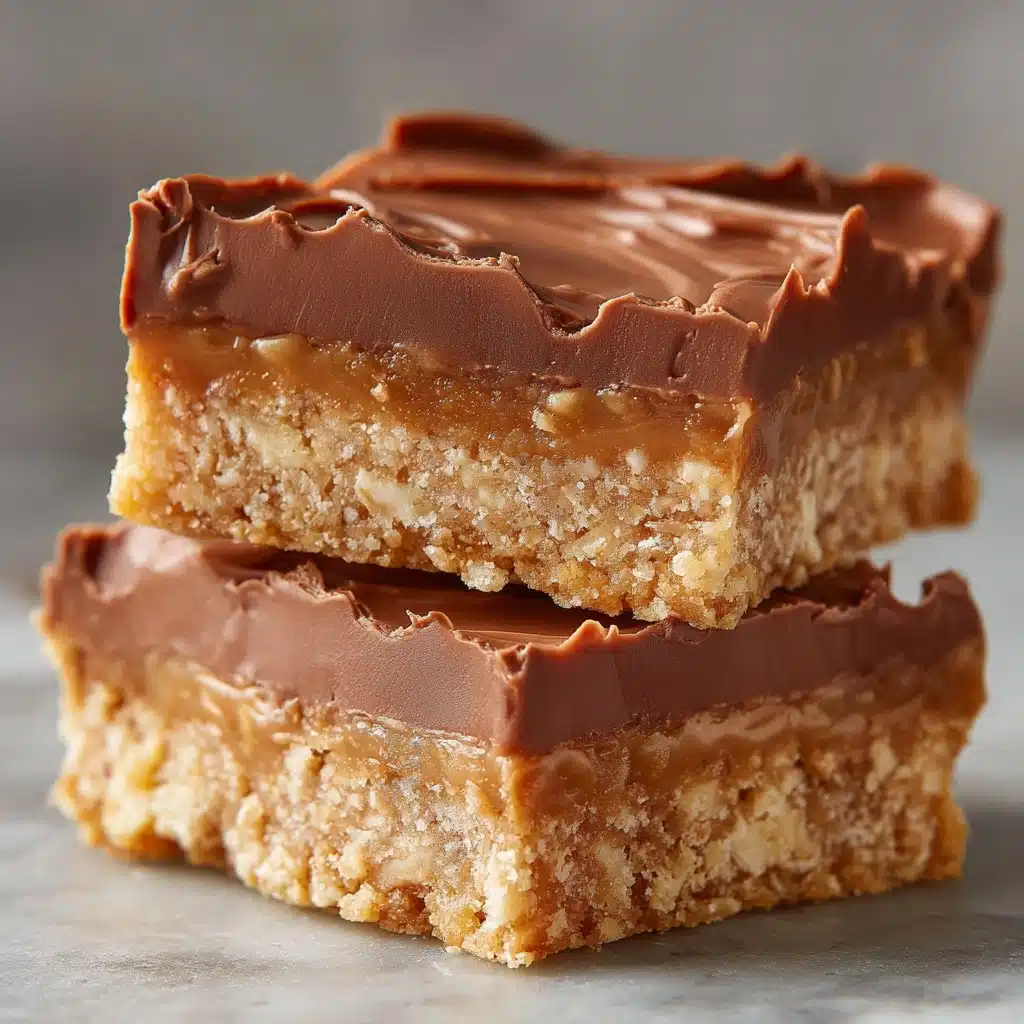
Irresistible Disneyland’s Peanut Butter Sandwich Bars Recipe
If you’ve ever wandered around Disneyland, caught a whiff of something nutty-sweet, and found yourself craving the park’s most iconic chocolate-and-peanut butter treat, you’re going to fall head over heels for these Irresistible Disneyland’s Peanut Butter Sandwich Bars. This no-bake dessert perfectly balances creamy peanut butter, sweet graham cracker crumbs, and silky milk chocolate, capturing that magical combo of nostalgia and indulgence. With simple ingredients and easy steps, you’ll recreate the happiest dessert on earth right from your own kitchen.
Ingredients You’ll Need
Every great recipe starts with the basics, and these Irresistible Disneyland’s Peanut Butter Sandwich Bars are no exception. Each component brings something special: a bit of crunch, a creamy texture, or that just-right sweetness. Here’s what you’ll need (and why you’ll love it):
- Graham cracker crumbs: These give the bars their subtly crunchy, classic base and that unmistakable buttery flavor.
- Powdered sugar: This ingredient helps hold the bars together while adding a gentle, melt-in-your-mouth sweetness.
- Creamy peanut butter: The heart of the bars, providing luscious texture and rich, nutty taste — and it’s used in both layers for double the delight.
- Unsalted butter (melted): Adds moisture and a velvety richness that binds the crumb mixture into a perfectly sliceable layer.
- Milk chocolate chips: The top chocolate layer brings smooth, milky decadence, creating a candy-bar finish.
- Additional creamy peanut butter (for topping): Mixed with chocolate to create an extra-silky, nutty topping that sets up beautifully after chilling.
How to Make Irresistible Disneyland’s Peanut Butter Sandwich Bars
Step 1: Mix the Peanut Butter Base
Start by grabbing your largest mixing bowl (trust me, you’ll want room to really stir). Combine the graham cracker crumbs, powdered sugar, and a cup of creamy peanut butter. Then, pour in the melted butter and mix everything together. Keep stirring until you have a thick, cohesive dough that sticks together — this is the foundation of your Irresistible Disneyland’s Peanut Butter Sandwich Bars and guarantees that ultimate chewy-meets-crunchy bite.
Step 2: Press and Smooth the Crust
Line a 9×13-inch pan with parchment paper for easy removal later. Press the peanut butter mixture firmly and evenly across the bottom of the pan. Use a spatula or even the back of a measuring cup to really pack it in so your bars have a sturdy base. Smooth the surface as evenly as you can; this helps the chocolate layer glide on beautifully in the next step.
Step 3: Prepare the Chocolate-Peanut Butter Topping
Now it’s time to make that glossy, decadent top layer that defines Irresistible Disneyland’s Peanut Butter Sandwich Bars. In a microwave-safe bowl, combine the milk chocolate chips and a half-cup of creamy peanut butter. Microwave in short 30-second bursts, stirring after each one, until the mixture is silky-smooth and completely blended. You want a pourable consistency for that flawless finish.
Step 4: Spread the Chocolate Layer
Pour the melted chocolate-peanut butter mixture over the pressed base. Use a clean spatula to gently spread it from edge to edge, making sure every corner gets coated. This is your moment to channel your inner chocolatier and get that even, shiny layer that looks just like the Disneyland version!
Step 5: Chill and Slice
Transfer the whole pan to your refrigerator and let the bars chill for at least one hour, or until the chocolate top is completely set. Once firm, lift the bars out with the parchment and cut them into generous squares or the famous long rectangles for that true theme-park experience. Serve them chilled for extra snap or at room temperature for a melty treat.
How to Serve Irresistible Disneyland’s Peanut Butter Sandwich Bars
Garnishes
For something a little extra, sprinkle crumbled graham crackers or a pinch of flaky sea salt over the chocolate layer before chilling. You can even drizzle with a touch of melted white chocolate for a pop of contrast. Each garnish adds its own sparkle and makes your Irresistible Disneyland’s Peanut Butter Sandwich Bars even more photogenic (and irresistible!).
Side Dishes
These bars are rich and satisfying, so serve with a tall glass of cold milk, hot coffee, or a scoop of vanilla ice cream to really round out the experience. A fresh fruit salad on the side adds color and brightness, balancing out all that peanut butter and chocolate goodness.
Creative Ways to Present
If you want to wow your friends or recreate that Disneyland magic, wrap each bar individually in parchment paper strips and tie with a bit of twine. Stack them in a bakery box or arrange on a platter with colorful napkins for your own at-home snack cart. These personal touches make the experience of eating Irresistible Disneyland’s Peanut Butter Sandwich Bars even more fun and festive!
Make Ahead and Storage
Storing Leftovers
Place any leftover bars in an airtight container and refrigerate. They’ll stay fresh and delicious for up to one week. The cold keeps the chocolate layer crisp, and the bars remain wonderfully chewy and flavorful, so feel free to make them a day or two in advance.
Freezing
These bars are surprisingly freezer-friendly! Wrap each square in wax paper and store in a zip-top bag or airtight container. Freeze for up to three months — just thaw at room temperature or in the fridge whenever a peanut butter craving strikes. It makes meal-prepping dessert a dream.
Reheating
There’s no need to reheat these no-bake bars, but if you prefer them a little softer, leave them out at room temperature for about 20 minutes. This takes off the chill and makes the chocolate topping dreamily creamy once again, just like a fresh batch.
FAQs
Can I use crunchy peanut butter instead of creamy?
Absolutely! Crunchy peanut butter adds a lovely extra crunch to the bars. It’s a great way to personalize your Irresistible Disneyland’s Peanut Butter Sandwich Bars for those who love more texture in every bite.
Do I need to use milk chocolate, or can I try dark or semi-sweet?
Milk chocolate gives you that authentic, park-perfect flavor, but you can definitely substitute dark or semi-sweet chocolate chips for a richer, deeper taste. Just make sure to melt the chips gently with the peanut butter for the smoothest possible topping.
How do I get clean slices without cracking the chocolate?
For perfect, bakery-style cuts, let the bars chill completely, then use a sharp knife warmed under hot water and wiped dry. Press down in one smooth motion for each slice, and you’ll get pristine edges on your Irresistible Disneyland’s Peanut Butter Sandwich Bars every time.
Can I make these gluten-free?
Yes! Simply substitute gluten-free graham cracker crumbs to make these bars safe for gluten-sensitive friends. The texture and flavor will still be amazing, and everyone can enjoy the magic.
Are these bars safe for kids to make?
Definitely! Since there’s no baking involved, little ones can help with mixing, pressing, and stirring (with adult supervision during any microwave steps). It’s a wonderful recipe for making kitchen memories together, much like a trip to Disneyland itself.
Final Thoughts
If there’s one treat to bring a little pixie dust to your dessert table, it’s these Irresistible Disneyland’s Peanut Butter Sandwich Bars. With every bite, you’re instantly transported to the magic of Main Street, and it truly couldn’t be easier to recreate at home. Don’t wait for your next park adventure — grab those pantry staples and discover the joy of this unforgettable treat today!
Print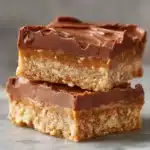
Irresistible Disneyland’s Peanut Butter Sandwich Bars Recipe
- Total Time: 1 hour 15 minutes (including chilling)
- Yield: 16 bars 1x
- Diet: Non-Vegetarian
Description
Indulge in the nostalgia of Disneyland with these irresistible Peanut Butter Sandwich Bars. A no-bake treat that combines creamy peanut butter, chocolate, and graham crackers for a delightful dessert reminiscent of the park’s iconic flavors.
Ingredients
Graham Cracker Base:
- 2 cups graham cracker crumbs
- 1 cup powdered sugar
- 1 cup creamy peanut butter
- ¾ cup unsalted butter, melted
Chocolate Layer:
- 1½ cups milk chocolate chips
- ½ cup creamy peanut butter
Instructions
- Prepare Graham Cracker Base: In a large mixing bowl, combine graham cracker crumbs, powdered sugar, and 1 cup of peanut butter. Stir in melted butter. Press mixture into a 9×13-inch pan.
- Prepare Chocolate Layer: Melt chocolate chips and ½ cup peanut butter in the microwave. Pour over the peanut butter base.
- Chill and Serve: Refrigerate for 1 hour, then cut into bars. Serve chilled or at room temperature.
Notes
- Use crunchy peanut butter for added texture.
- Bars can be frozen for up to 3 months.
- For a Disneyland-style presentation, slice into rectangles and wrap individually.
- Prep Time: 15 minutes
- Cook Time: 0 minutes
- Category: Dessert
- Method: No-Bake
- Cuisine: American
Nutrition
- Serving Size: 1 bar
- Calories: 310
- Sugar: 18g
- Sodium: 160mg
- Fat: 22g
- Saturated Fat: 9g
- Unsaturated Fat: 11g
- Trans Fat: 0g
- Carbohydrates: 24g
- Fiber: 2g
- Protein: 6g
- Cholesterol: 15mg

