Homemade Nesquik Recipe
If you’ve ever wished for that perfect glass of chocolate milk but wanted a healthier, homemade version, you are in for a treat. Homemade Nesquik is a simple, four-ingredient chocolate milk powder that whips up in minutes, tastes just like childhood, and lets you skip all the additives found in store-bought mixes. Once you know how to make this DIY chocolate mix, you’ll wonder why you ever bought the boxed kind—plus, it’s so easy, you’ll want to share it with everyone you love!
Ingredients You’ll Need
One of the best things about Homemade Nesquik is how straightforward the ingredient list is. Each item has a unique role to play, giving you a classic chocolate milk experience with no surprises—just pure, nostalgic flavor and the smoothest texture imaginable.
- Unsweetened cocoa powder: This is your rich chocolatey foundation! Use a high-quality brand for deeper flavor and better mixing.
- Powdered sugar: The key to a perfectly sweet, instantly dissolving mix—no grittiness, just creamy sweetness.
- Cornstarch (optional): Stir this in for anti-caking magic, especially if you’ll be storing the mix for a while.
- Salt: Just a pinch wakes up all the chocolate and balances the sweetness beautifully.
How to Make Homemade Nesquik
Step 1: Sift and Combine the Dry Ingredients
Start by placing the cocoa powder, powdered sugar, optional cornstarch, and salt into a medium bowl. Sift the ingredients together to break up any lumps—this step ensures your Homemade Nesquik powder will blend seamlessly into your milk, creating that ultra-smooth finish you crave.
Step 2: Whisk Until Evenly Mixed
Use a whisk to thoroughly blend the ingredients until you have one consistent, chocolaty powder. If you prefer, you can achieve an even silkier mix by pulsing everything in a food processor for about 30 seconds. This moves your mix into “next-level” territory, and the result is super dissolvable in both cold and warm milk.
Step 3: Transfer to an Airtight Container
Spoon your Homemade Nesquik mixture into a glass jar or airtight container. Label it (trust me, you’ll want to show it off!), seal it up, and store in a cool, dry spot. You’ll have a supply of homemade chocolate milk magic ready whenever the craving strikes.
Step 4: Make Your Chocolate Milk
For a classic drink, add 2 tablespoons of Homemade Nesquik to a cup of cold or warm milk. Mix well; it should dissolve quickly. Feel free to adjust the sweetness to taste by adding a touch more mix or a splash of extra milk—this is your homemade goodness after all!
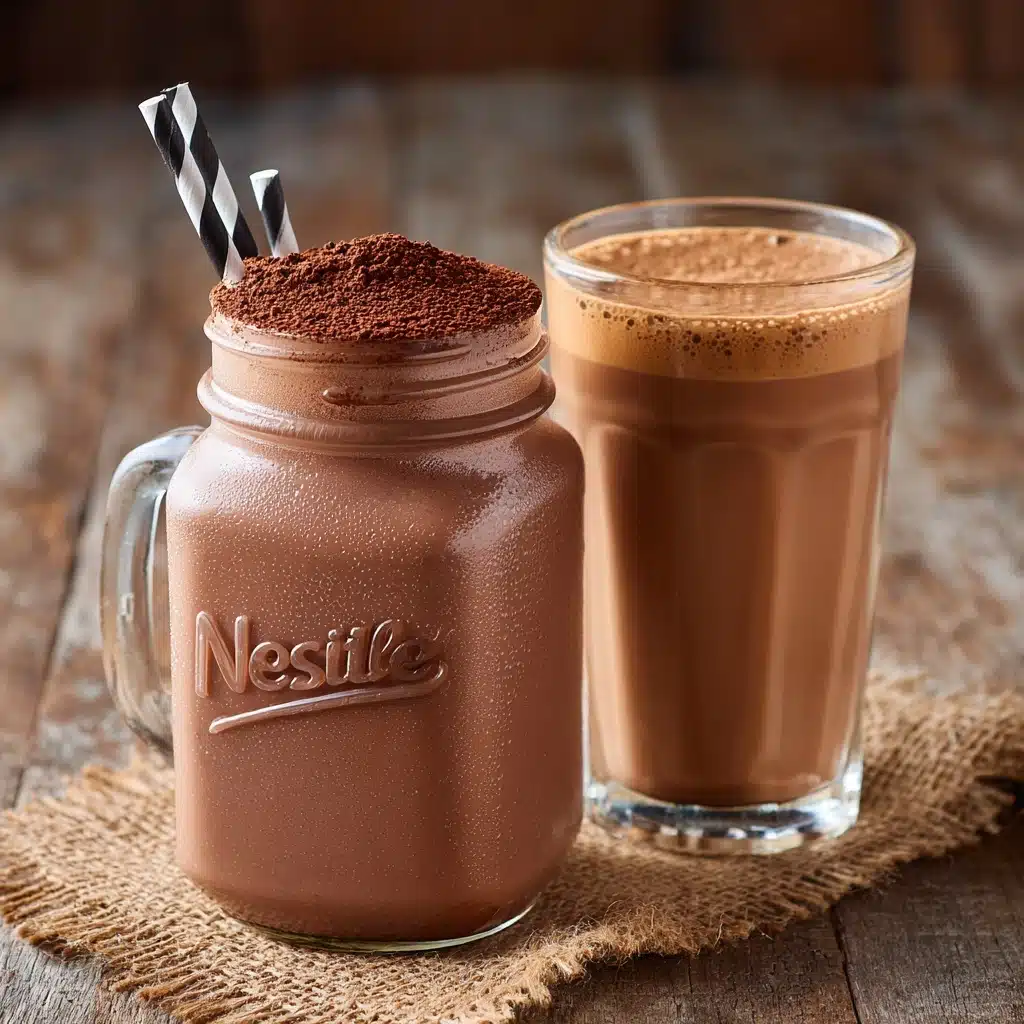
How to Serve Homemade Nesquik

Garnishes
Turn each glass of Homemade Nesquik into a little moment of delight. Top your chocolate milk with a swirl of whipped cream, a sprinkle of cocoa powder, or a pinch of chocolate shavings. For a special breakfast, try cinnamon or a tiny pinch of flaky sea salt as a finishing flourish.
Side Dishes
Homemade Nesquik pairs beautifully with classic snacks like warm chocolate chip cookies, peanut butter toast, or fresh fruit. It also makes a dreamy companion to pancakes or waffles, making breakfast feel extra special and indulgent.
Creative Ways to Present
If you’re serving kids (or fun-loving adults!), pour the chocolate milk into mason jars with colorful paper straws, or rim the cups with sprinkles. For a wintry treat, serve warm with mini marshmallows and a cinnamon stick for stirring. You can even gift the dry mix in small jars with a cute label and ribbon for a homemade chocolate gift.
Make Ahead and Storage
Storing Leftovers
Keep your Homemade Nesquik in an airtight jar or container in a cool, dry pantry. It’ll stay fresh for several months. The optional cornstarch really helps prevent clumping so every scoop remains perfectly powdery and ready to go.
Freezing
Freezing isn’t necessary and isn’t recommended for this dry mix—it lasts wonderfully at room temperature. However, if you want to freeze pre-mixed chocolate milk made with Homemade Nesquik, just pour it into a sealed container and thaw in the fridge before stirring and serving.
Reheating
To heat up pre-mixed chocolate milk, simply microwave your glass in 30-second increments or gently warm on the stovetop over low heat, stirring often. Homemade Nesquik dissolves smoothly and reheats easily for a cozy mug of hot chocolate anytime.
FAQs
Can I use non-dairy milk with Homemade Nesquik?
Absolutely! Almond, oat, soy, and coconut milk all work beautifully with Homemade Nesquik. Just stir into cold or warmed non-dairy milk for a luscious treat that fits your preferences.
Is cornstarch necessary in the recipe?
The cornstarch is totally optional. It’s there for anti-caking—helpful if you plan to store the mix for weeks or months. If you’ll use it quickly, you can safely leave it out.
Does this taste like store-bought Nesquik?
Yes, Homemade Nesquik delivers that classic chocolate milk flavor, but even better since you control the sweetness and chocolate intensity. Plus, there are no fillers or unpronounceable ingredients!
Can I adjust the amount of sugar?
Definitely—feel free to increase or decrease the powdered sugar to suit your taste. If you like a darker, less sweet chocolate, start with less and add more as needed.
What else can I do with Homemade Nesquik?
Get creative! Sprinkle it over oatmeal, blend into smoothies, toss into pancake or waffle batter, or even use it as a topping for ice cream. The possibilities truly are endless.
Final Thoughts
There’s something incredibly satisfying about mixing up a batch of Homemade Nesquik and knowing exactly what’s in your glass of chocolate milk. It’s easy, fun, and endlessly adaptable—so gather your ingredients and give it a try. Your inner child (and your taste buds) will thank you!
Print
Homemade Nesquik Recipe
- Total Time: 5 minutes
- Yield: About 1½ cups mix (12 servings) 1x
- Diet: Vegetarian
Description
Learn how to make your own homemade Nesquik chocolate milk powder with this easy recipe. Perfect for mixing into cold or warm milk, this DIY cocoa mix is a delicious treat for both kids and adults.
Ingredients
Dry Mix:
- 1 cup unsweetened cocoa powder
- 2/3 cup powdered sugar
- 1½ teaspoons cornstarch (optional)
- ¼ teaspoon salt
Instructions
- Mix Dry Ingredients: In a medium bowl, sift together cocoa powder, powdered sugar, cornstarch (if using), and salt. Whisk until smooth.
- Store: Transfer to an airtight container and store in a cool, dry place.
- To Make Chocolate Milk: Stir 2 tablespoons of mix into 1 cup of cold or warm milk. Mix well until dissolved. Adjust sweetness to taste.
Notes
- For a smoother mix, blend dry ingredients in a food processor.
- Can be used with dairy or non-dairy milk.
- Stays fresh for several months when stored properly.
- Can be stirred into warm milk for hot chocolate.
- Prep Time: 5 minutes
- Cook Time: 0 minutes
- Category: Beverage
- Method: No-Cook
- Cuisine: American
Nutrition
- Serving Size: 2 tablespoons mix
- Calories: 50
- Sugar: 8 g
- Sodium: 60 mg
- Fat: 1 g
- Saturated Fat: 0.5 g
- Unsaturated Fat: 0.5 g
- Trans Fat: 0 g
- Carbohydrates: 11 g
- Fiber: 2 g
- Protein: 1 g
- Cholesterol: 0 mg


