Chocolate Covered Mint Patties Recipe
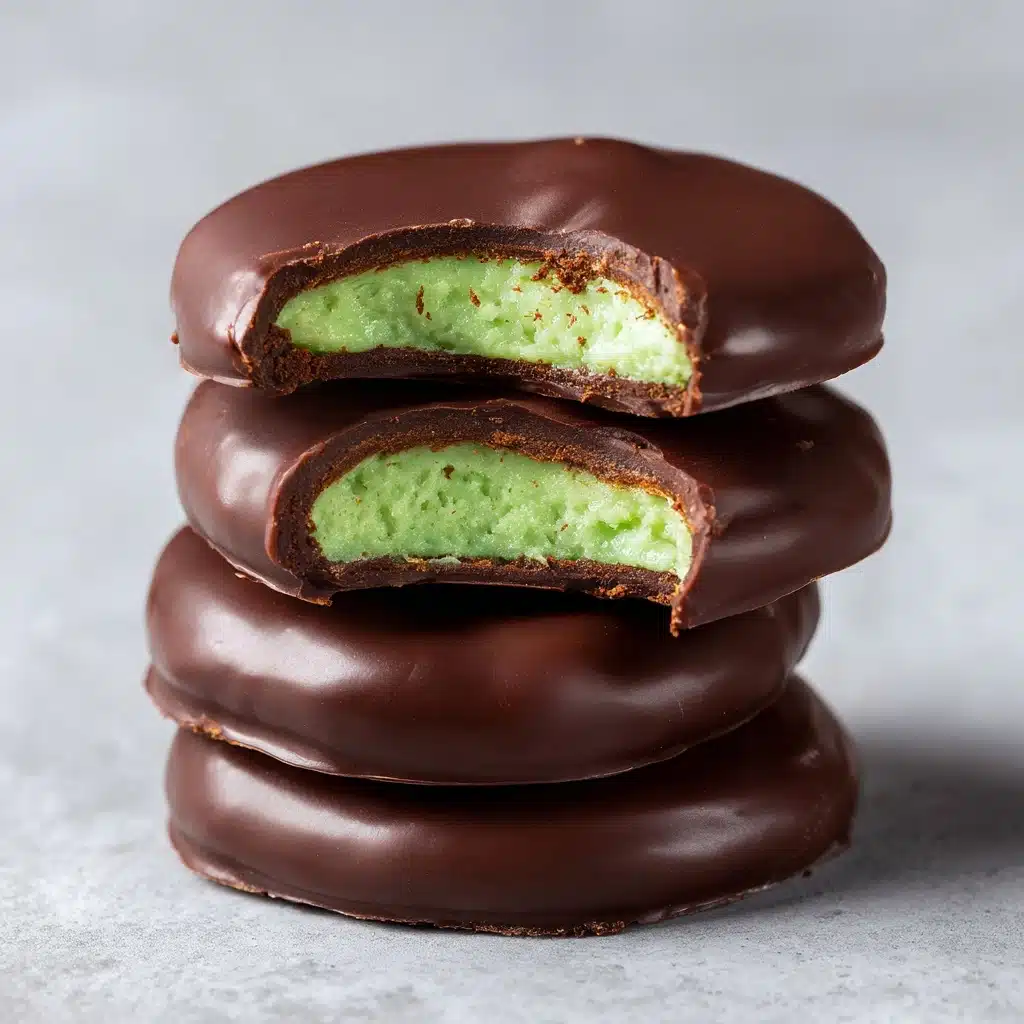
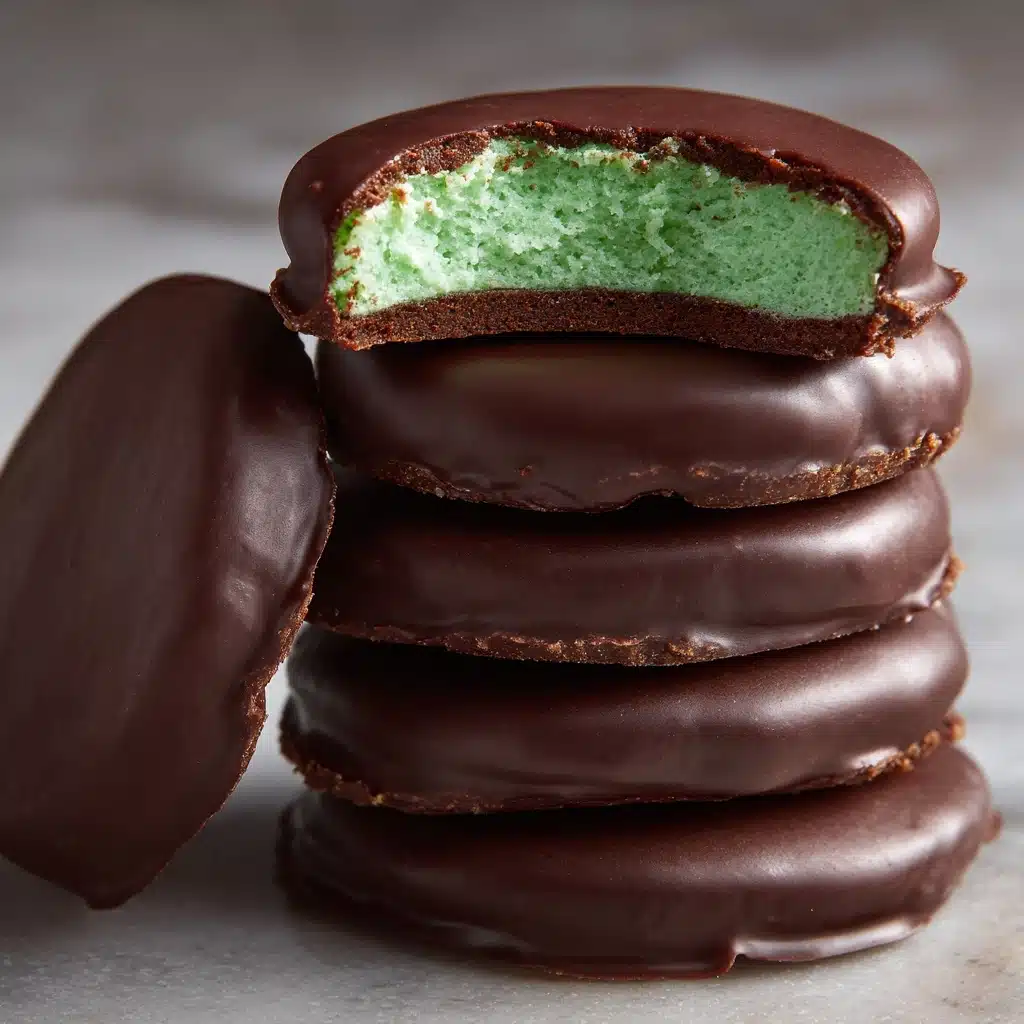
If you love the irresistible combination of cool mint and rich chocolate, these Chocolate Covered Mint Patties are about to become your next kitchen obsession. Each bite delivers that dreamy, creamy mint center wrapped in a glossy shell of luscious dark chocolate—just like your favorite store-bought treat, but made with simple ingredients right at home. Whether you’re making these for holiday gifts, a fun weekend project, or to stash in your freezer for sweet cravings, they’re bound to become a family favorite. Get ready for a treat that’s refreshingly easy, delightfully decadent, and absolutely unforgettable!
Ingredients You’ll Need
Making Chocolate Covered Mint Patties is all about a handful of straightforward ingredients coming together in perfect harmony. Each one is essential, creating the classic taste and dreamy texture we all love. Here’s what makes these homemade candies shine:
- Powdered sugar: This forms the sweet and silky base for the minty filling and keeps the texture melt-in-your-mouth smooth.
- Unsalted butter: Adds richness and helps the filling hold its shape without being greasy.
- Heavy cream: Brings just the right amount of creaminess, so your patties are neither dry nor sticky.
- Peppermint extract: The star of the show—just a small amount delivers big, refreshing mint flavor in every bite.
- Pinch of salt: Balances sweetness and enhances the chocolate and mint flavors.
- Semi-sweet or dark chocolate: Melts into a glossy, decadent coating that perfectly complements the cool mint center.
- Coconut oil or shortening (optional): Stir in a teaspoon for an extra-smooth, snappy chocolate shell that sets beautifully.
How to Make Chocolate Covered Mint Patties
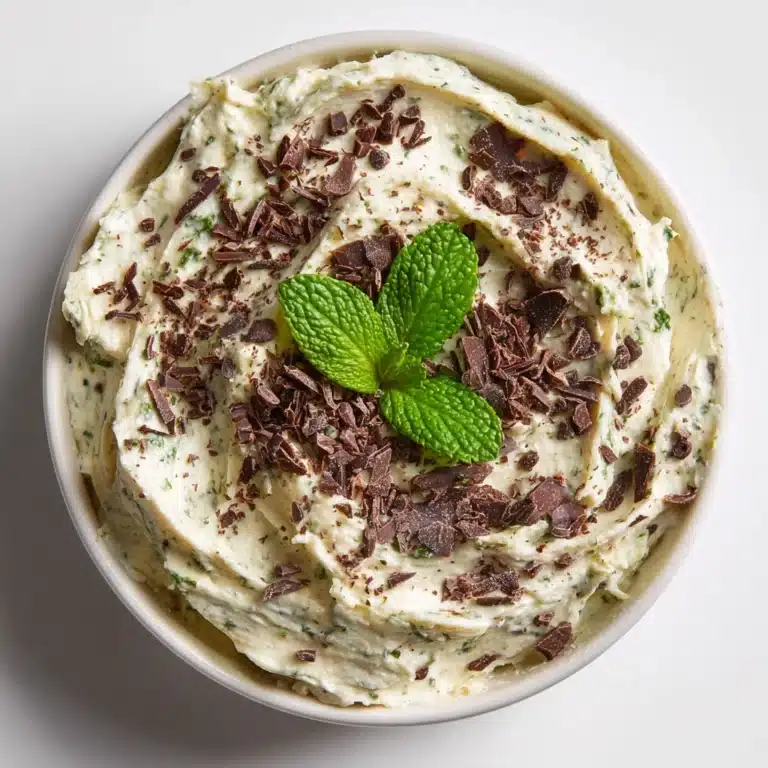
Step 1: Make the Mint Filling
In a medium bowl, combine the powdered sugar, softened butter, heavy cream, peppermint extract, and a pinch of salt. Stir everything together until you have a smooth, thick dough. If you find the mixture a bit too soft to handle, just pop it in the refrigerator for 10 to 15 minutes—it will firm up perfectly for shaping.
Step 2: Shape the Patties
Once your filling has the right consistency, scoop out small portions and roll them into 1-inch balls. Flatten each ball gently between your palms to form classic disc shapes. Arrange them on a parchment-lined baking sheet to prevent sticking. Then, slide the tray into the freezer for 20 to 30 minutes. This quick chill makes them sturdy enough for dipping into warm chocolate without losing their shape.
Step 3: Melt the Chocolate
While your mint patties firm up, grab a microwave-safe bowl and add your chopped semi-sweet or dark chocolate, along with the coconut oil or shortening if you’re using it. Microwave in 20-second intervals, stirring after each burst, until the chocolate is smooth and glossy. Be patient—gentle melting ensures your chocolate stays shiny and doesn’t seize up.
Step 4: Dip and Coat
Now for the fun part! Take your chilled mint discs and, using a fork, dip each one into the melted chocolate. Let any excess drip off before placing them back on the parchment-lined tray. Don’t worry if things get a little messy—imperfections just make them look more homemade and charming. Once all the patties are coated, refrigerate them for another 10 to 15 minutes to set the chocolate shell.
Step 5: Enjoy and Store
When the chocolate is set, your Chocolate Covered Mint Patties are ready to devour! Store them in an airtight container in the fridge, where they’ll stay fresh and delicious for up to a week (although good luck making them last that long!).
How to Serve Chocolate Covered Mint Patties
Garnishes
Dress up your Chocolate Covered Mint Patties with a sprinkle of flaked sea salt, a dusting of cocoa powder, or a drizzle of white chocolate for a bakery-worthy finish. If you’re feeling festive, add a touch of edible glitter or colored sprinkles before the chocolate sets for a pop of color and fun.
Side Dishes
These mint patties are a perfect treat on their own, but if you want to build a dessert platter, pair them with fresh berries, vanilla ice cream, or a hot cup of coffee. Their cool, bright flavor also makes them a lovely palate cleanser between rich or heavy desserts at a dinner party.
Creative Ways to Present
Wrap your Chocolate Covered Mint Patties in parchment paper or colorful foil for adorable homemade gifts. Arrange them in a decorative tin or box, tie with a ribbon, and you’ve got a heartfelt present for holidays, birthdays, or just because. They also look stunning stacked on a cake stand as the centerpiece of your dessert table!
Make Ahead and Storage
Storing Leftovers
To keep your Chocolate Covered Mint Patties fresh, simply store them in an airtight container in the refrigerator. They’ll hold their flavor and texture beautifully for up to a week, making them ideal for snacking or sharing throughout the week.
Freezing
If you want to make a big batch ahead of time, these patties freeze remarkably well. Place them in a single layer on a baking sheet until firm, then transfer to a freezer-safe bag or container—just separate layers with parchment to prevent sticking. They’ll keep for up to three months and thaw quickly at room temperature.
Reheating
There’s no need to reheat Chocolate Covered Mint Patties, but if you enjoy them a little softer, let them sit at room temperature for 10 to 15 minutes before serving. This brings out the creaminess of the filling and the snap of the chocolate—perfection!
FAQs
Can I use a different type Dessert
Absolutely! Feel free to swap dark or semi-sweet chocolate for milk or white chocolate, depending on your personal taste. White chocolate gives these patties a fun twist and a beautiful contrast if you like to experiment.
How do I get the chocolate coating extra smooth and shiny?
Adding a teaspoon of coconut oil or shortening to the melting chocolate works wonders for a glossy, smooth finish. Also, make sure your patties are very cold before dipping to help the chocolate set quickly and evenly.
Is it necessary to chill the patties before dipping?
Yes, chilling is key! Freezing the mint discs ensures they’re firm enough to dip in warm chocolate without falling apart or losing their shape. Don’t skip this step for the best results.
Can I add food coloring to the filling?
Definitely! Just a drop or two of green food coloring will give your mint patties that classic look. You can also get creative with pastel pinks or blues for special occasions like Easter or baby showers.
Are these Chocolate Covered Mint Patties gluten-free?
Yes, this recipe is naturally gluten-free as written. Just double-check your chocolate and other ingredients to ensure they’re certified gluten-free if you’re serving someone with sensitivities.
Final Thoughts
There’s something truly special about making Chocolate Covered Mint Patties from scratch—each bite is cool, creamy, and wrapped in love (and chocolate!). Whether you whip them up for a holiday gathering or a little everyday indulgence, I hope you’ll enjoy sharing them just as much as I do. Try them soon, and let their irresistible flavor bring a fresh burst of joy to your kitchen!
Print
Chocolate Covered Mint Patties Recipe
- Total Time: 55 minutes
- Yield: 24 patties 1x
- Diet: Vegetarian
Description
Delicious homemade chocolate covered mint patties with a smooth peppermint-flavored filling coated in rich semi-sweet or dark chocolate. These no-bake treats are perfect for holiday gifting or enjoying as a refreshing dessert.
Ingredients
Mint Filling
- 2 cups powdered sugar
- 1 tablespoon unsalted butter, softened
- 2 tablespoons heavy cream
- ½ teaspoon peppermint extract
- Pinch of salt
Chocolate Coating
- 8 oz semi-sweet or dark chocolate, chopped or chips
- 1 teaspoon coconut oil or shortening (optional, for smoother coating)
Instructions
- Prepare the Mint Filling: In a medium bowl, mix together the powdered sugar, softened butter, heavy cream, peppermint extract, and a pinch of salt. Stir until a smooth and thick dough forms. If the mixture is too soft to shape, chill it in the refrigerator for 10 to 15 minutes.
- Shape the Patties: Scoop small amounts of the dough and roll into 1-inch balls. Flatten each ball into a disc shape. Place the discs onto a parchment-lined baking sheet and freeze for 20 to 30 minutes until they become firm.
- Melt the Chocolate: While the mint patties chill, melt the chocolate and optional coconut oil in a microwave-safe bowl. Heat in 20-second intervals, stirring in between until the chocolate is smooth and completely melted.
- Dip the Patties: Remove the mint discs from the freezer and dip each one into the melted chocolate, allowing the excess to drip off. Place the dipped patties back onto the parchment-lined tray.
- Set the Chocolate: Chill the chocolate-coated patties in the refrigerator for 10 to 15 minutes until the coating is fully set and firm.
- Store Properly: Store the finished mint patties in an airtight container in the refrigerator for up to one week to maintain freshness.
Notes
- For a festive look, add a drop of green food coloring to the mint filling.
- Try using white chocolate instead of dark for a sweeter flavor variation.
- These chocolate covered mint patties make fantastic homemade holiday gifts.
- Prep Time: 25 minutes
- Cook Time: 0 minutes
- Category: Dessert
- Method: No-Bake
- Cuisine: American
Nutrition
- Serving Size: 1 patty
- Calories: 120
- Sugar: 17 g
- Sodium: 5 mg
- Fat: 5 g
- Saturated Fat: 3 g
- Unsaturated Fat: 2 g
- Trans Fat: 0 g
- Carbohydrates: 20 g
- Fiber: 1 g
- Protein: 1 g
- Cholesterol: 2 mg


