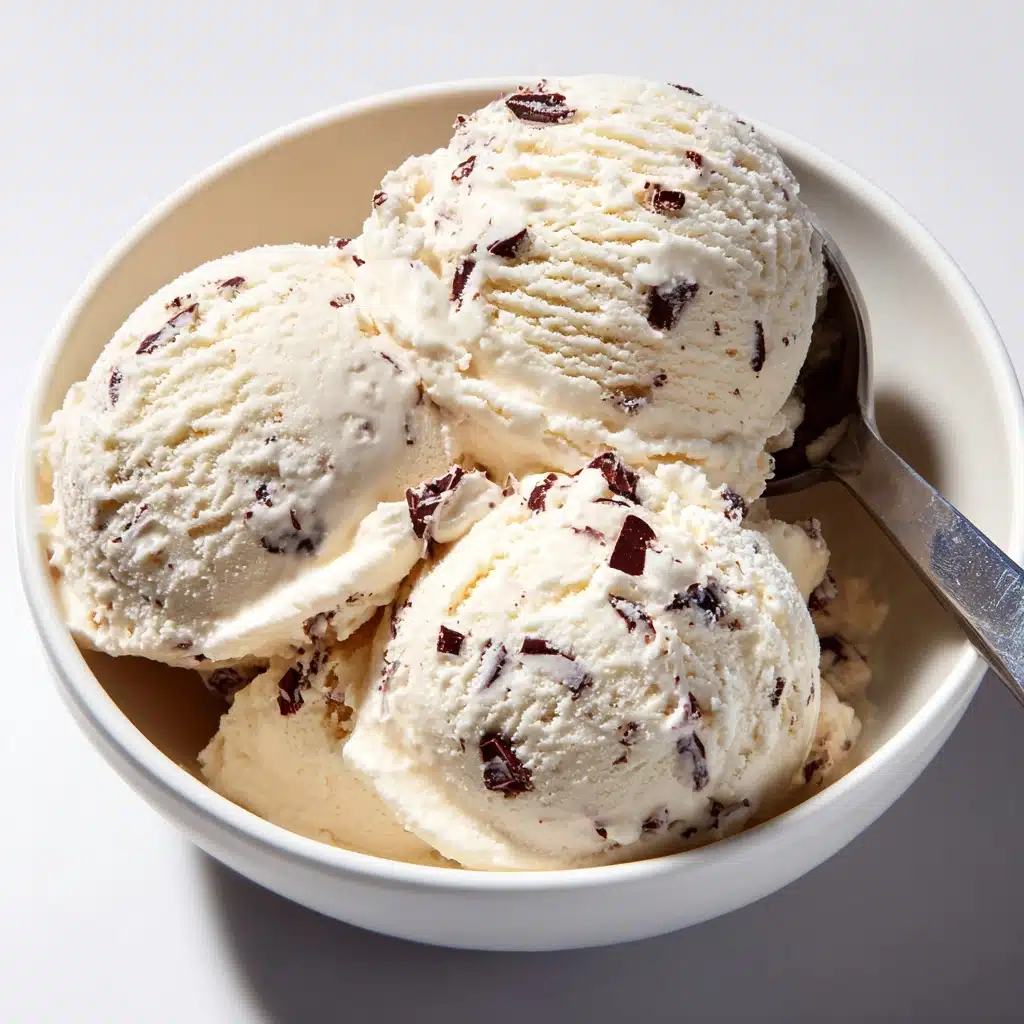
Classic Vanilla Ice Cream Recipe
If you’re searching for the ultimate creamy treat, look no further than Classic Vanilla Ice Cream. This beloved dessert is so much more than a simple scoop — it’s a nostalgic bite of summer, a blank canvas for toppings, and a gorgeous finale to any meal. With its rich custard base, pure vanilla aroma, and silken texture, Classic Vanilla Ice Cream is a timeless favorite I find myself making again and again. Whether you serve it solo or dress it up with fun mix-ins, this recipe is the real deal for ice cream lovers everywhere.
Ingredients You’ll Need
The beauty of Classic Vanilla Ice Cream lies in its simplicity. Each ingredient plays a starring role: the cream makes it luscious, the egg yolks add richness, and the vanilla brings that irresistible aroma. Gather these essentials, and you’re halfway to homemade ice cream bliss.
- Heavy cream: Gives the ice cream its signature silky texture and decadent mouthfeel.
- Whole milk: Lightens the base while keeping it creamy, so every bite is perfectly balanced.
- Granulated sugar: Sweetens the custard and also helps prevent iciness when frozen.
- Pure vanilla extract: Provides that unmistakable, fragrant vanilla flavor — don’t skimp on quality here.
- Pinch of salt: Just a touch enhances all the flavors, making each spoonful more vibrant.
- Large egg yolks: Create a rich, custard-like base that’s ultra-smooth and satisfying.
How to Make Classic Vanilla Ice Cream
Step 1: Warm the Milk, Sugar, and Salt
Start by combining the whole milk, granulated sugar, and a pinch of salt in a medium saucepan. Warm them over medium heat, stirring gently, just until the sugar dissolves and the mixture is heated through. You’re not looking for a boil here — just a gentle warmth that helps everything meld together.
Step 2: Whisk the Egg Yolks
In a separate mixing bowl, whisk the egg yolks until they’re smooth and slightly thickened. This not only blends the yolks but also prepares them to be tempered, which is key for a silky, lump-free custard.
Step 3: Temper the Yolks
This step is crucial for Classic Vanilla Ice Cream. Slowly pour about 1/2 cup of the warm milk mixture into the whisked yolks, whisking constantly. This gently raises the temperature of the eggs without scrambling them. Once combined, gradually whisk the tempered yolks back into the saucepan with the remaining milk mixture.
Step 4: Cook the Custard
Cook the mixture over low heat, stirring constantly with a wooden spoon or spatula. Patience is key: you want the custard to thicken just enough to coat the back of a spoon, reaching about 170°F (77°C). Don’t walk away — it can thicken quickly!
Step 5: Strain and Add Cream & Vanilla
Take the pan off the heat and pour the custard through a fine mesh sieve into a clean bowl. This removes any tiny cooked egg bits. Stir in the heavy cream and pure vanilla extract, blending until smooth and fragrant. Already, that classic vanilla aroma will fill your kitchen.
Step 6: Chill Thoroughly
Cover the bowl and refrigerate the mixture for at least 4 hours, or better yet, overnight. Chilling is vital for a smooth churning process and maximum flavor development in your Classic Vanilla Ice Cream.
Step 7: Churn and Freeze
Once the base is thoroughly chilled, churn it in your ice cream maker according to the manufacturer’s instructions. When it reaches a soft-serve consistency, transfer it to a lidded container and freeze for at least 2 hours. This final freeze sets the texture, making each scoop dreamy and scoopable.
How to Serve Classic Vanilla Ice Cream
Garnishes
The beauty of Classic Vanilla Ice Cream is how well it pairs with just about anything. Try a drizzle of homemade chocolate sauce, a sprinkle of toasted nuts, fresh berries, or even a dusting of cinnamon. For true vanilla lovers, a few curls of white chocolate or a light scattering of rainbow sprinkles can make it extra special.
Side Dishes
Classic Vanilla Ice Cream shines alongside so many desserts. Serve it next to a warm apple pie, a fudgy brownie, or a slice of berry cobbler. It’s also incredible with grilled peaches or sandwiched between two cookies for an irresistible ice cream sandwich.
Creative Ways to Present
Want to wow your guests? Scoop your Classic Vanilla Ice Cream into vintage coupe glasses, or serve it in edible waffle bowls. Layer it in parfaits with crunchy granola and fresh fruit, or try making decadent ice cream floats with sparkling soda. The possibilities are as endless as your imagination!
Make Ahead and Storage
Storing Leftovers
Store any leftover Classic Vanilla Ice Cream in a tightly sealed, freezer-safe container. To keep it ultra-smooth, press a piece of parchment or plastic wrap directly onto the surface before sealing the lid. This helps prevent ice crystals from forming on top.
Freezing
Homemade ice cream is at its best within the first week of freezing, though it will keep for up to two weeks. For perfect scooping, let the container sit at room temperature for 5 to 10 minutes before serving.
Reheating
Ice cream doesn’t need reheating, but if your Classic Vanilla Ice Cream is too firm, just let it stand on the counter for a few minutes to soften. Never microwave, as this can melt and ruin its creamy texture.
FAQs
Can I make Classic Vanilla Ice Cream without an ice cream maker?
Absolutely! While an ice cream maker produces the creamiest texture, you can pour the chilled base into a shallow dish, freeze, and stir vigorously every 30 minutes for a few hours. The texture will be a bit more rustic, but still delicious.
Is it possible to use a vanilla bean instead of extract?
Yes! Split a vanilla bean lengthwise and scrape out the seeds, then steep both seeds and pod in the milk mixture as it heats. Remove the pod before combining with the egg yolks. This adds even more intense vanilla flavor to your Classic Vanilla Ice Cream.
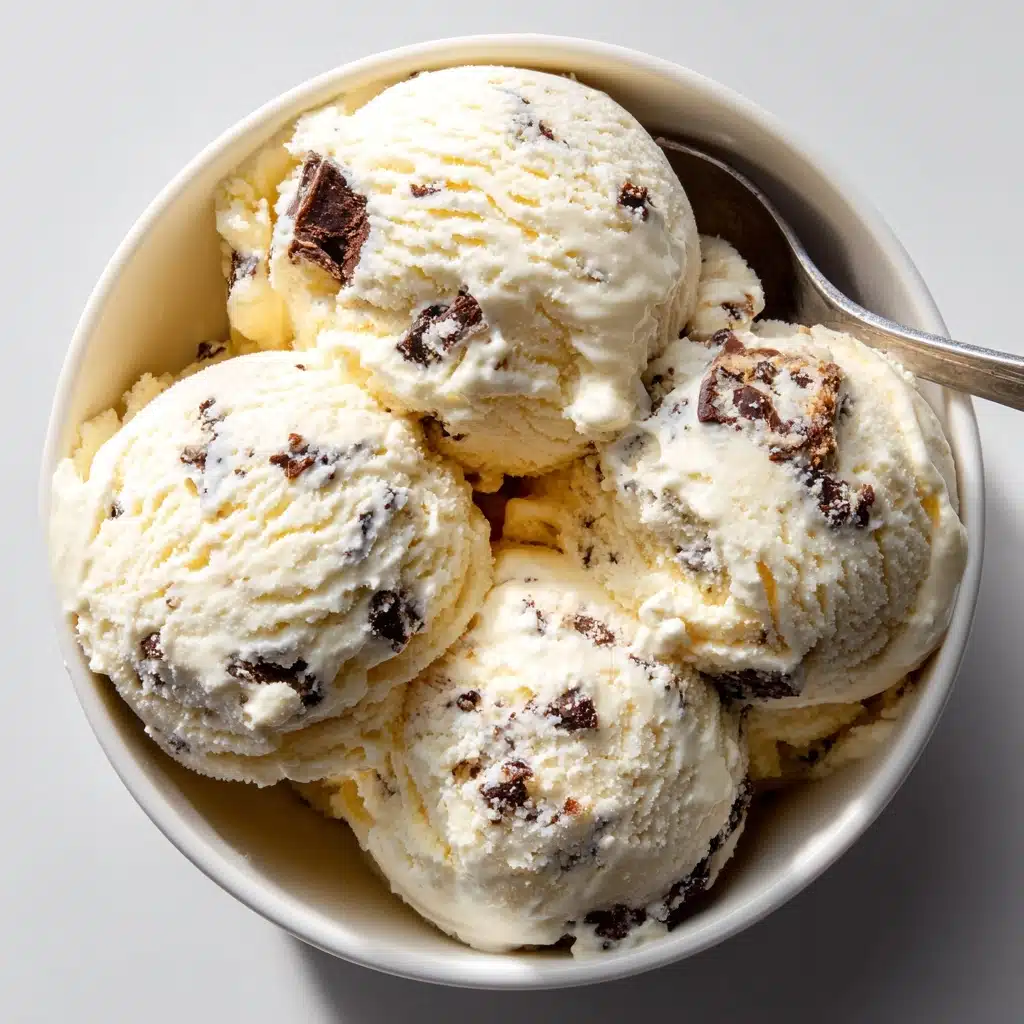
Can I add mix-ins like chocolate chips or fruit?
Definitely. Stir in your favorite mix-ins, like chopped nuts, crushed cookies, or fruit preserves, right after churning but before the final freeze. This way, your Classic Vanilla Ice Cream stays smooth and the add-ins are evenly distributed.
How do I prevent ice crystals from forming?
Make sure your custard base is fully chilled before churning, and always store the finished ice cream with a piece of plastic wrap or parchment pressed directly onto the surface. This minimizes air exposure and helps keep your Classic Vanilla Ice Cream creamy.
Is this recipe suitable for people with egg allergies?
This version uses egg yolks for a custard base, but you can try eggless recipes that rely on cornstarch or condensed milk for creaminess if you need an alternative. The flavor and texture will be a bit different, but still tasty!
Final Thoughts
There’s something magical about making Classic Vanilla Ice Cream from scratch — from whisking the custard to tasting the first creamy spoonful. Whether you’re a seasoned dessert maker or a curious beginner, this recipe is a joy to make and even more delightful to share. Give it a try, and let Classic Vanilla Ice Cream become a beloved tradition in your kitchen too!
Print
Classic Vanilla Ice Cream Recipe
- Total Time: 6 hours (including chilling and freezing)
- Yield: 1 quart (about 8 servings) 1x
- Diet: Vegetarian
Description
Classic homemade vanilla ice cream made with rich cream, milk, eggs, and pure vanilla extract. This creamy, smooth dessert is perfect for any occasion and can be customized with mix-ins for extra flavor.
Ingredients
Base Ingredients
- 2 cups heavy cream
- 1 cup whole milk
- 3/4 cup granulated sugar
- 1 tablespoon pure vanilla extract
- pinch of salt
- 5 large egg yolks
Instructions
- Warm the milk mixture: In a medium saucepan, combine the milk, sugar, and salt over medium heat. Stir until the sugar dissolves and the mixture is warm but not boiling.
- Temper the egg yolks: In a separate bowl, whisk the egg yolks. Slowly pour about 1/2 cup of the warm milk mixture into the yolks, whisking constantly to temper them and prevent curdling.
- Combine and thicken: Gradually whisk the tempered yolks back into the saucepan. Cook the mixture over low heat, stirring constantly until it thickens slightly and coats the back of a spoon, reaching about 170°F (77°C).
- Strain and chill: Remove from heat and strain the custard through a fine mesh sieve into a clean bowl to remove any cooked egg bits. Stir in the heavy cream and vanilla extract. Cover and refrigerate for at least 4 hours or overnight to chill thoroughly.
- Churn the ice cream: Once chilled, pour the mixture into an ice cream maker and churn according to the manufacturer’s instructions until it reaches a soft-serve consistency.
- Freeze to firm: Transfer the churned ice cream into a lidded container and freeze for at least 2 hours to firm up before serving.
Notes
- For an intensified vanilla flavor, substitute vanilla extract with a vanilla bean pod by splitting and steeping it in the milk mixture during heating.
- Add mix-ins such as crushed cookies, chocolate chips, or nuts after churning for extra texture and taste.
- Prep Time: 20 minutes (plus 4+ hours chilling time)
- Cook Time: 15 minutes
- Category: Dessert
- Method: Churning
- Cuisine: American
Nutrition
- Serving Size: 1/2 cup
- Calories: 250
- Sugar: 20g
- Sodium: 45mg
- Fat: 18g
- Saturated Fat: 11g
- Unsaturated Fat: 6g
- Trans Fat: 0g
- Carbohydrates: 21g
- Fiber: 0g
- Protein: 4g
- Cholesterol: 150mg


