Banana Pudding Cups Recipe
If you have a soft spot for classic Southern desserts, this Banana Pudding Cups Recipe will charm you from the very first spoonful! Each creamy, dreamy cup features layers of luscious vanilla pudding, airy whipped cream, fresh banana slices, and those iconic vanilla wafers. What makes these banana pudding cups truly special is the way the flavors meld together as they chill, creating a comforting treat that’s nostalgic, portable, and 100 percent crowd-pleasing. Whether you’re looking for a showstopping picnic dessert, a sweet snack for family night, or just an excuse to use up ripe bananas, you’ll be coming back to this recipe over and over again.
Ingredients You’ll Need
-
For the Pudding:
- 1 (3.4 oz) box instant vanilla pudding mix
- 2 cups cold milk
- 1 (14 oz) can sweetened condensed milk
- 1 1/2 cups heavy whipping cream
- 1 teaspoon vanilla extract
For Assembly:
- 4 ripe bananas, sliced
- 2 cups vanilla wafer cookies, crushed or whole
- Whipped cream for topping (optional)
- Fresh banana slices or crushed wafers for garnish
How to Make Banana Pudding Cups Recipe
Step 1: Make the Vanilla Pudding Base
Start by whisking the instant vanilla pudding mix with cold milk in a medium bowl. This step is essential for a super smooth and creamy base. Whisk until everything is combined, then let it rest for about 2 minutes—this gives the pudding time to thicken up naturally. You’ll know it’s ready when it coats the back of a spoon and jiggles just a little bit.
Step 2: Sweeten and Enrich
Now stir in the sweetened condensed milk. This not only sweetens the pudding perfectly but also adds a rich, velvety body that you won’t find in regular pudding alone. Fold until the mixture is beautifully smooth with no streaks.
Step 3: Whip and Fold
In a separate bowl, whisk the heavy whipping cream with vanilla extract until stiff peaks form—this means the cream will hold its shape firmly when you lift out the whisk. Gently fold this whipped cream into your pudding mixture. Use a light hand here so your pudding stays fluffy and light; this is the step that gives the Banana Pudding Cups Recipe their signature cloud-like texture.
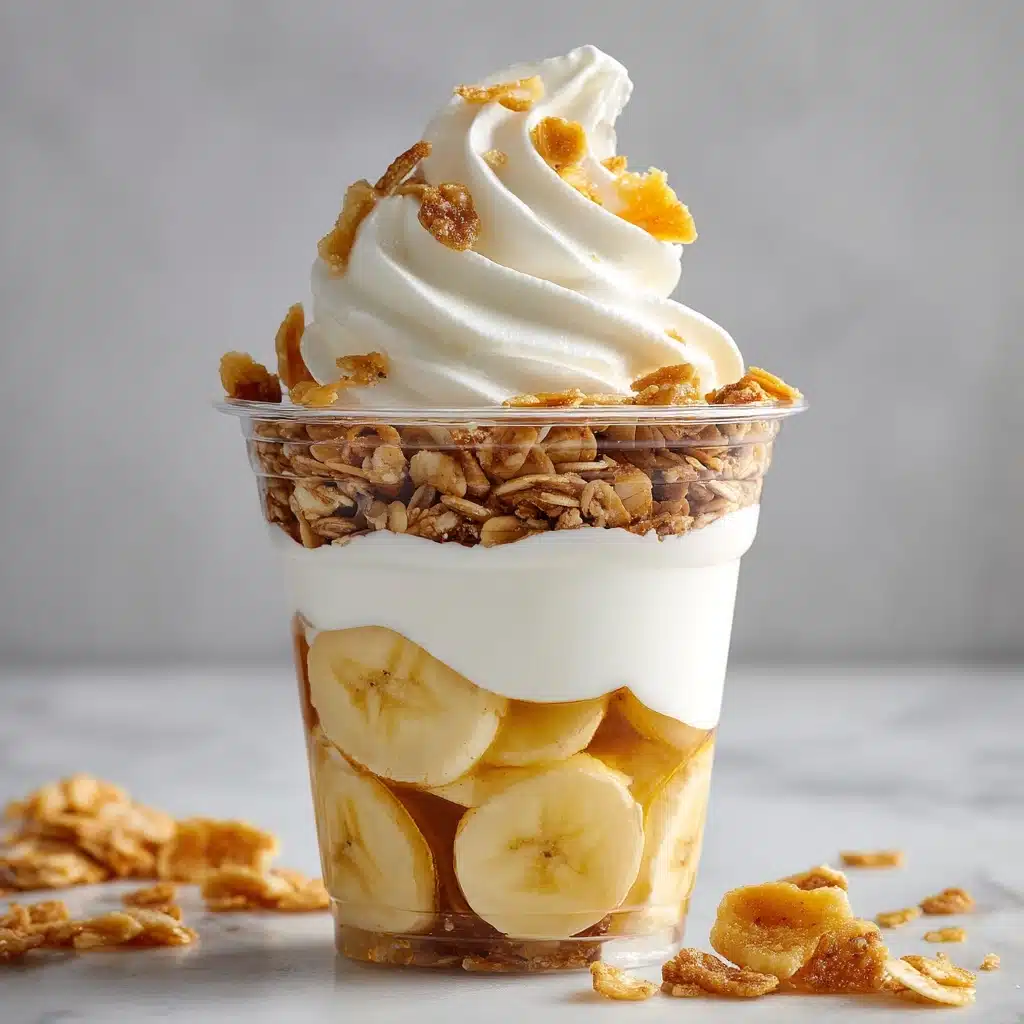
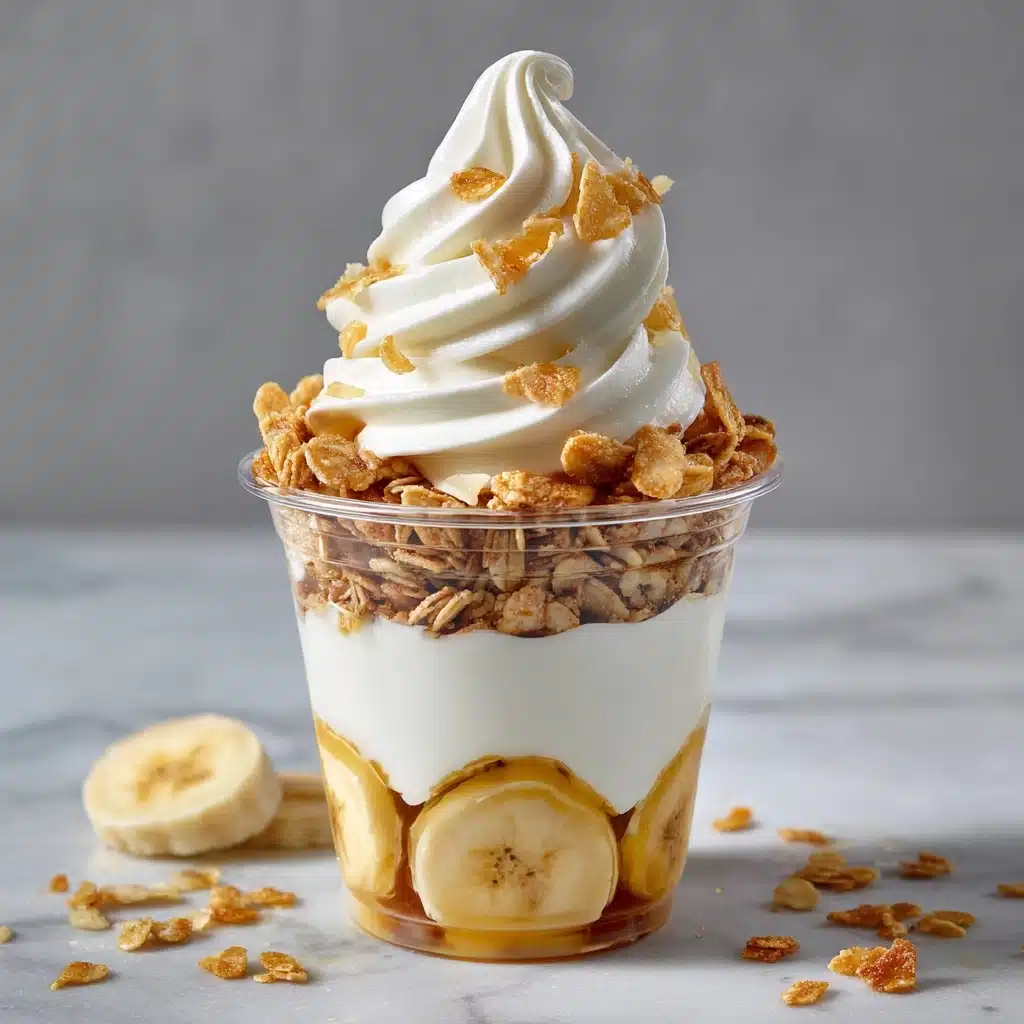
Step 4: Layer the Goodness
Time for the fun part! Grab small glass cups or jars and start layering: first a bed of crushed vanilla wafers, then a layer of sliced bananas, followed by a generous scoop of your dreamy pudding mixture. Repeat the layers until you reach the rim, making sure to end with a pudding layer on top to seal in all that moisture and flavor.
Step 5: Chill and Serve
Pop your assembled cups in the refrigerator for at least 2 hours. This rest time allows the wafers to soften slightly and all the flavors to meld. Just before serving, crown each cup with a swirl of whipped cream, a sprinkle of crushed wafers, and a fresh banana slice. Dive in and enjoy your homemade Banana Pudding Cups Recipe!
How to Serve Banana Pudding Cups Recipe
Garnishes
Garnishing makes these pudding cups feel extra special, like a dessert straight from a beloved family gathering. I love to top mine with a dollop of whipped cream, a few extra banana slices, and a handful of crushed vanilla wafers for crunch. A sprig of mint can add a splash of color if you’re feeling fancy!
Side Dishes
Although these banana pudding cups can definitely stand alone, they do pair beautifully with simple sides. Consider serving them alongside fresh berries, a pitcher of iced tea, or a light fruit salad for a dreamy summer dessert table. They also make a playful contrast to a rich chocolate dessert if you’re building a multi-course sweet spread.
Creative Ways to Present
The Banana Pudding Cups Recipe is meant for fun, so get creative! Use mason jars for a rustic picnic vibe, or layer everything in fancy glass stemware for a more elegant party. If you’re serving kids, try clear disposable cups with playful toppings—they’re perfect for little hands. You can even make mini versions using shot glasses for bite-sized party treats.
Make Ahead and Storage
Storing Leftovers
If you have any leftover banana pudding cups, just cover them tightly with plastic wrap or close the lids on jars and store in the refrigerator. They’ll keep well for up to 2 days, although the bananas will darken slightly over time. Don’t worry—the flavor is still every bit as dreamy and comforting!
Freezing
I wouldn’t recommend freezing your Banana Pudding Cups Recipe, since both the bananas and whipped cream tend to lose their lovely texture once thawed. The wafers can also become soggy. For the best experience, enjoy these cups fresh from the fridge.
Reheating
Luckily, since this is a no-bake dessert, there’s no reheating required. In fact, these pudding cups are at their best served nice and cold, with all the flavors and layers in perfect harmony. If you’ve made them ahead, just let them sit out for a minute or two to take the chill off and dive in!
FAQs
Can I use homemade pudding instead of instant?
Absolutely! If you love making pudding from scratch, feel free to use about 2 cups of homemade vanilla pudding. Just be sure it’s fully chilled and set before assembling your Banana Pudding Cups Recipe.
How can I keep the bananas from turning brown?
For the best appearance, slice the bananas just before layering and assemble right away. Some folks like to toss banana slices in a splash of lemon juice to slow down browning, but it’s not essential if you serve within a day.
Are there gluten-free options?
Yes! Just use gluten-free vanilla wafer cookies. All the other ingredients are typically gluten-free, making it easy for everyone to enjoy your Banana Pudding Cups Recipe.
Can I make this recipe the night before?
Definitely! In fact, letting the cups chill overnight gives the flavors even more time to mingle. Hold off on the final garnishes until just before serving for the prettiest presentation.
Is it possible to double the recipe for a bigger group?
Yes, doubling (or even tripling) this Banana Pudding Cups Recipe is super easy—just multiply each ingredient and get ready to layer! Use a bigger bowl and more cups or jars for serving and you’re all set for a party.
Final Thoughts
There’s just something timeless about this Banana Pudding Cups Recipe—it’s easy enough for busy weeknights but special enough for every celebration. I hope you’ll give it a try, share it with the people you love, and make plenty of sweet, creamy memories along the way!
Print
Banana Pudding Cups Recipe
- Total Time: 2 hours 20 minutes (including chilling)
- Yield: 6 cups 1x
- Diet: Vegetarian
Description
Indulge in these delightful Banana Pudding Cups for a classic dessert experience. Layers of creamy vanilla pudding, ripe bananas, and crunchy wafers come together in this easy-to-make, no-bake treat.
Ingredients
For the Pudding:
- 1 (3.4 oz) box instant vanilla pudding mix
- 2 cups cold milk
- 1 (14 oz) can sweetened condensed milk
- 1 1/2 cups heavy whipping cream
- 1 teaspoon vanilla extract
For Assembly:
- 4 ripe bananas, sliced
- 2 cups vanilla wafer cookies, crushed or whole
- Whipped cream for topping (optional)
- Fresh banana slices or crushed wafers for garnish
Instructions
- Prepare the Pudding: In a medium bowl, whisk together the instant pudding mix and cold milk until smooth. Let sit for 2 minutes to thicken. Stir in the sweetened condensed milk until well combined.
- Whip the Cream: In a separate bowl, whip the heavy cream with vanilla extract until stiff peaks form. Gently fold the whipped cream into the pudding mixture until fully incorporated.
- Assemble the Cups: Layer crushed vanilla wafers, banana slices, and pudding mixture in small cups or jars. Repeat layers as desired, finishing with a layer of pudding. Top with whipped cream, crushed wafers, or banana slices.
- Chill and Serve: Refrigerate for at least 2 hours before serving to allow flavors to meld and wafers to soften slightly.
Notes
- These cups can be made 1 day ahead and stored covered in the refrigerator.
- For extra texture, reserve some whole wafers for the final layer right before serving.
- Prep Time: 20 minutes
- Cook Time: 0 minutes
- Category: Dessert
- Method: No-Bake
- Cuisine: American
Nutrition
- Serving Size: 1 cup
- Calories: 410
- Sugar: 30 g
- Sodium: 220 mg
- Fat: 22 g
- Saturated Fat: 13 g
- Unsaturated Fat: 8 g
- Trans Fat: 0 g
- Carbohydrates: 48 g
- Fiber: 1 g
- Protein: 6 g
- Cholesterol: 70 mg

