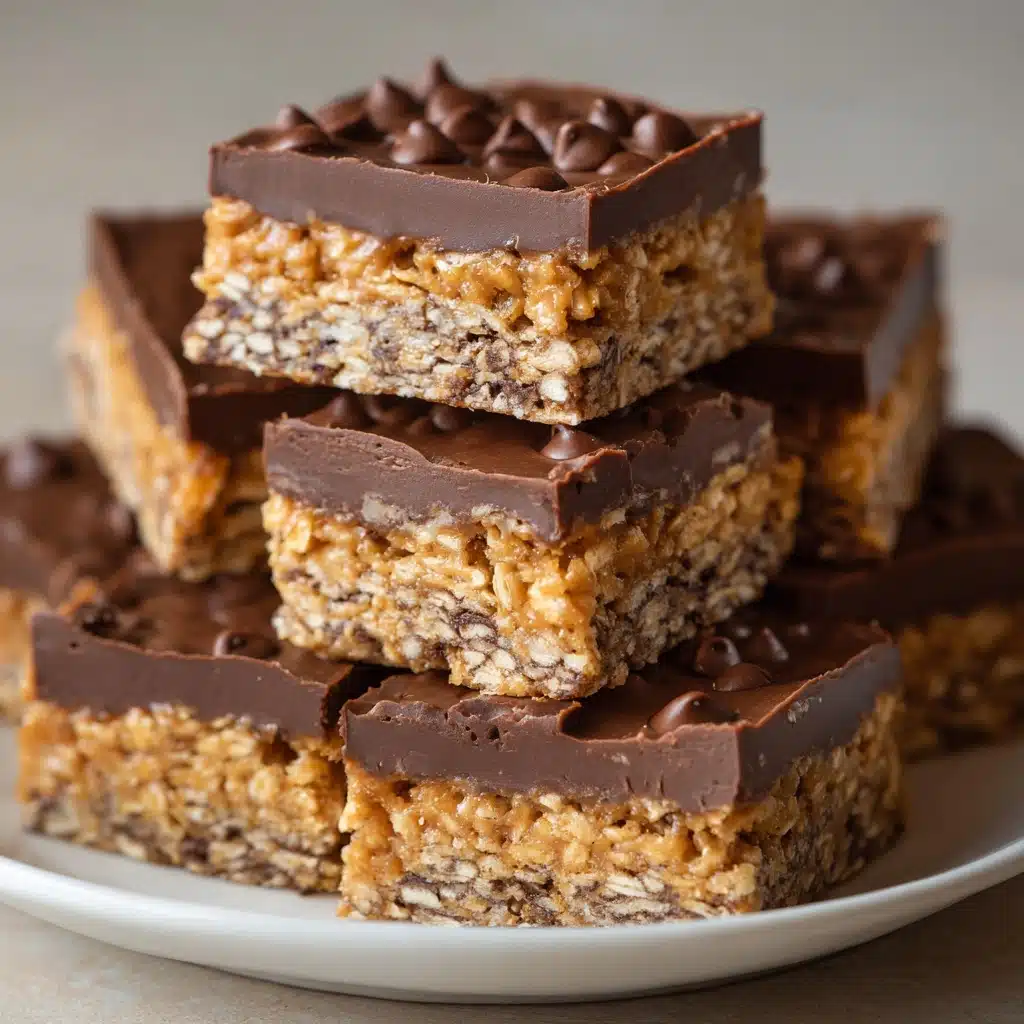
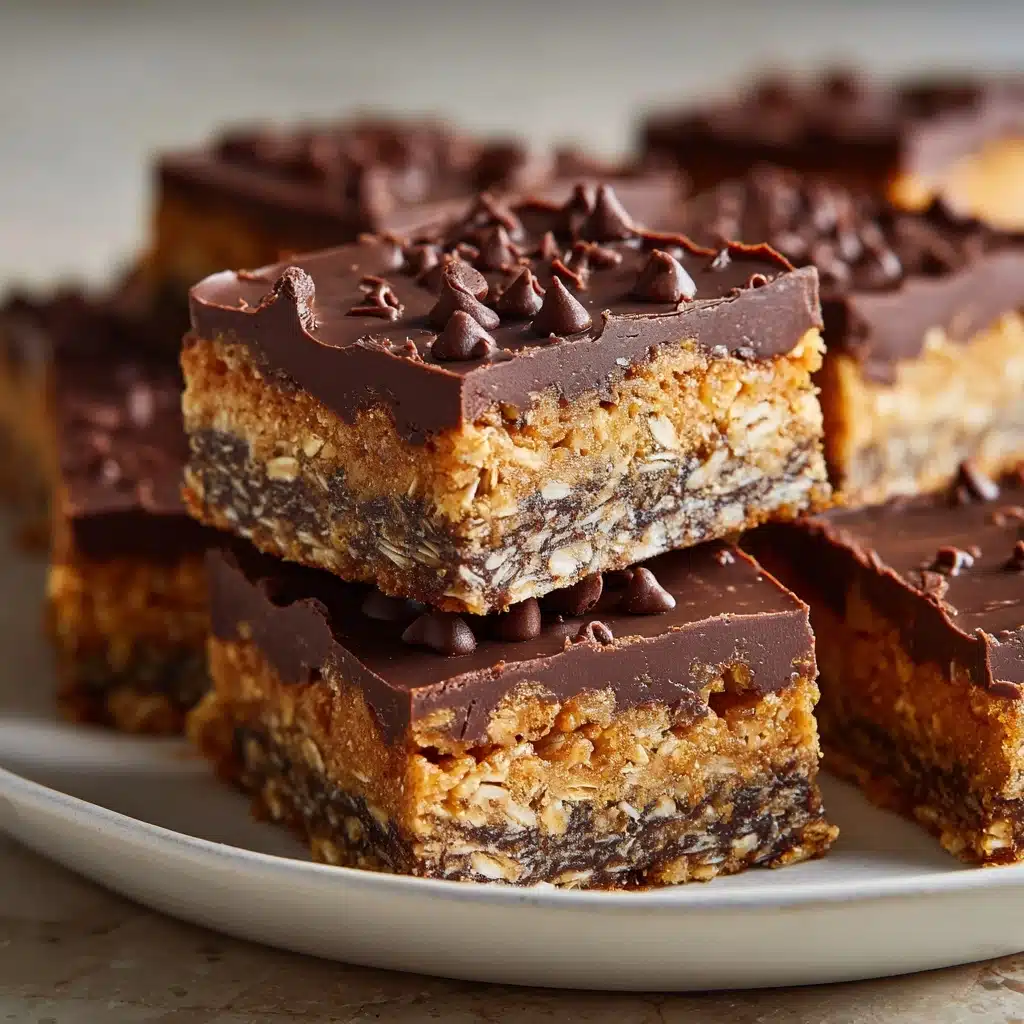
Protein Bars Recipe
If you’re searching for a reliable, drool-worthy snack that’s just as satisfying after a workout as it is alongside your afternoon coffee, these Protein Bars are about to become your new favorite. With a chewy, tender texture studded with bursts of chocolate and the richness of nut butter, each bar offers a reassuringly simple ingredient list and the power to keep you fueled wherever life takes you. Wholesome oats, gooey honey, and your choice of protein powder come together with zero baking required—just a little love and a fridge!
Ingredients You’ll Need
The magic of these Protein Bars is how their everyday pantry staples combine to create a snack that feels totally indulgent while being good-for-you. Each ingredient has its role—whether it’s texture, sweetness, or that all-important protein boost.
- Old-fashioned oats: Give the bars their hearty chew and keep you full longer.
- Natural peanut butter or almond butter: Provides rich, nutty flavor and helps bind everything together.
- Honey or maple syrup: Naturally sweetens the bars and adds a lovely, sticky texture.
- Vanilla or chocolate protein powder (about 30g): The star protein source; adds creaminess and flavor—choose your favorite.
- Mini chocolate chips or chopped dark chocolate: For little pops of chocolate in every bite—use dark for a slightly bitter edge.
- Vanilla extract: Elevates the overall flavor profile, making the bars taste bakery-quality.
- Salt: Just a pinch to make the sweetness and chocolate sing.
- Milk (2–3 tbsp, as needed): Helps achieve the perfect, pliable dough consistency without making it crumbly.
How to Make Protein Bars
Step 1: Prepare Your Pan
Start by lining an 8×8-inch baking pan with parchment paper, leaving some overhang so you can lift the bars out easily later. This small trick makes cleanup a breeze and ensures your bars won’t stick—no one wants to lose a single crumb!
Step 2: Mix Wet Ingredients
In a large mixing bowl, stir together your nut butter of choice, honey or maple syrup, vanilla extract, and salt until completely smooth and glossy. This creamy foundation is what will hold the Protein Bars together and impart that irresistible, cookie dough-like flavor.
Step 3: Add Dry Ingredients
Add the oats, protein powder, and chocolate chips into the bowl with your wet mixture. Use a spatula or sturdy spoon to mix until everything’s evenly combined. The mixture should look thick and a bit crumbly at this point.
Step 4: Adjust Consistency
If the mixture feels too dry or isn’t coming together, add milk one tablespoon at a time, mixing after each addition. You’re aiming for a thick, slightly sticky dough that presses together easily—this makes cutting super neat bars later on.
Step 5: Press and Refrigerate
Scoop the mixture into your lined pan and use the back of a spatula or your hands to press it down firmly and evenly. Pop the pan into the refrigerator for at least one hour so the Protein Bars set up and slice cleanly.
Step 6: Slice and Enjoy
Once chilled and firm, lift the slab out of the pan using the parchment—then cut into 12 even bars. Snack away, or store for later—these beauties are just waiting to power your day!
How to Serve Protein Bars
Garnishes
A sprinkle of extra mini chocolate chips or a pinch of flaky sea salt on top of your Protein Bars right before chilling adds a little sparkle and an irresistible finish. If you’re feeling fancy, a drizzle of melted dark chocolate or a dusting of cocoa powder can also elevate each bar to next-level snack status!
Side Dishes
For a quick breakfast, pair a Protein Bar with a bowl of fresh berries or a banana for a dose of natural sweetness. If you’re packing a lunchbox, a crisp apple or a handful of roasted nuts alongside your bar turns it into a satisfying midday meal.
Creative Ways to Present
Get playful by cutting your Protein Bars into bite-sized cubes and serving them in cupcake liners for a party platter or healthy dessert board. Or, layer chunks of the bars with yogurt and more fruit for a snack parfait that looks as good as it tastes!
Make Ahead and Storage
Storing Leftovers
Keep your Protein Bars in an airtight container in the refrigerator—this keeps them fresh, firm, and flavorful for up to a week. Place a sheet of parchment between layers to prevent sticking if you’re stacking them.
Freezing
Protein Bars freeze beautifully! Wrap each bar individually or separate layers with wax paper, then tuck them in a freezer-safe bag or container. They’ll last up to 2 months; just let them thaw in the fridge or at room temperature before enjoying.
Reheating
No need to reheat these no-bake treats! If you prefer a softer texture, leave a bar out at room temperature for 5–10 minutes. If you’re craving a melty chocolate experience, zap a bar in the microwave for 7–10 seconds—just enough to make it gooey without losing its shape.
FAQs
Can I use quick oats instead of old-fashioned oats?
Absolutely! Quick oats will lend a slightly softer, smoother texture to the bars. Old-fashioned oats give a chewier bite, but both work well in this recipe.
How can I make these Protein Bars vegan?
Just swap honey for maple syrup and make sure to use a plant-based protein powder and dairy-free chocolate chips. You’ll have a 100 percent vegan bar with all the same delicious flavor.
Are these Protein Bars gluten-free?
Yes, as long as you use certified gluten-free oats and check your protein powder label for any gluten-containing ingredients. Always double-check packaging to be sure!
Can I add other mix-ins to the bars?
Definitely! Shredded coconut, dried fruit, chia seeds, flaxseed, or chopped nuts are all fantastic ways to add texture, flavor, and even more nutrition. Just keep total add-ins to 1/2 cup so the bars still hold together well.
What’s the best way to cut the Protein Bars cleanly?
Use a sharp knife, and if you want extra tidy edges, run the knife under hot water and wipe it clean between each slice. This helps keep the chocolate from smudging and creates neat, professional-looking bars.
Final Thoughts
Whether you’re making these for meal prep, post-gym fuel, or simply to satisfy your sweet tooth with something nourishing, these Protein Bars are a delight to have on hand. I can’t wait for you to try them and discover just how easy and versatile homemade snack bars can be. Happy snacking!
Print
Protein Bars Recipe
- Total Time: 1 hour 10 minutes (including chilling)
- Yield: 12 bars 1x
- Diet: Vegetarian, Gluten-Free (if using certified GF oats)
Description
These homemade Protein Bars are a delicious and nutritious snack option that are perfect for a quick energy boost. Packed with protein and wholesome ingredients, they are easy to make and can be customized to suit your taste preferences.
Ingredients
For the Protein Bars:
- 2 cups old-fashioned oats
- 1 cup natural peanut butter or almond butter
- ½ cup honey or maple syrup
- 1 scoop vanilla or chocolate protein powder (about 30 g)
- ½ cup mini chocolate chips or chopped dark chocolate
- 1 teaspoon vanilla extract
- ¼ teaspoon salt
- 2–3 tablespoons milk (as needed for consistency)
Instructions
- Line the Pan: Line an 8×8-inch baking pan with parchment paper.
- Mix Ingredients: In a large bowl, combine nut butter, honey, vanilla extract, and salt until smooth. Add oats, protein powder, and chocolate chips, mix well.
- Adjust Consistency: If too dry, add milk gradually until a thick dough forms.
- Press Into Pan: Press mixture evenly into the pan and refrigerate for at least 1 hour.
- Cut and Store: Once set, cut into bars and store in an airtight container in the fridge.
Notes
- Customize with add-ins like coconut, dried fruit, chia seeds, or nuts
- For lower sugar, use sugar-free chocolate chips or omit
- Bars stay fresh refrigerated for up to 1 week or frozen for up to 2 months
- Prep Time: 10 minutes
- Cook Time: 0 minutes
- Category: Snack, Breakfast
- Method: No-Bake
- Cuisine: American
Nutrition
- Serving Size: 1 bar
- Calories: 210
- Sugar: 10 g
- Sodium: 90 mg
- Fat: 10 g
- Saturated Fat: 2.5 g
- Unsaturated Fat: 7 g
- Trans Fat: 0 g
- Carbohydrates: 22 g
- Fiber: 3 g
- Protein: 10 g
- Cholesterol: 5 mg


