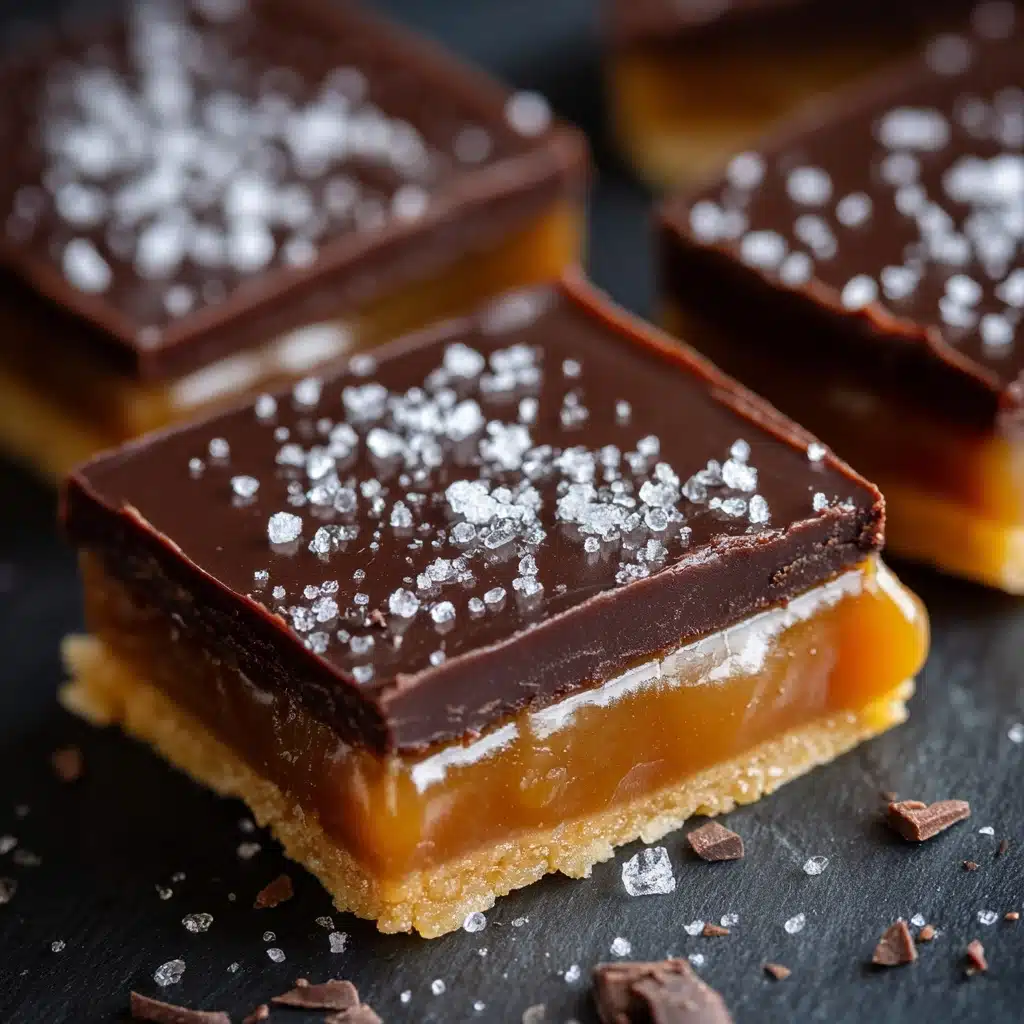
Homemade Chocolate Caramels Recipe
There are few things more delightful than unwrapping a luscious, chewy square of Homemade Chocolate Caramels and savoring that perfect blend of creamy, chocolatey richness and deep caramel flavor. These little treats are pure magic — just the right amount of sweetness, a melt-in-your-mouth texture, and a whisper of sea salt to make everything sing. Whether you’re making them for gifting, special occasions, or simply to spoil yourself, this recipe brings a touch of luxury to your home kitchen and proves just how delicious homemade candy can be.

Ingredients You’ll Need
Making irresistible Homemade Chocolate Caramels requires only a handful of everyday ingredients, but each one plays a crucial role in the texture and flavor. Choose the best quality you can, because when it comes to caramel, every detail counts!
- Heavy cream: Adds essential richness and creates an ultra-smooth, creamy texture for that signature melt-in-your-mouth bite.
- Granulated sugar: The backbone of any caramel, it provides sweetness and caramelizes for deep flavor.
- Light corn syrup: Helps prevent crystallization, ensuring your caramels stay soft and chewy instead of grainy.
- Unsweetened cocoa powder: Brings a luxurious chocolate depth; opt for high-quality cocoa for the best results.
- Salt: Balances the sweetness and sharpens all the other flavors—don’t skip it!
- Unsalted butter: Adds richness and a lovely glossy finish, making each caramel unbelievably smooth.
- Vanilla extract: Enhances both the caramel and chocolate notes, rounding out the flavors beautifully.
- Flaky sea salt (optional): The perfect finishing touch—a delicate crunch and a pop of savory contrast on top.
How to Make Homemade Chocolate Caramels
Step 1: Prepare Your Pan
Start by lining an 8×8-inch baking dish with parchment paper, leaving extra hanging over the sides. The overhang acts as handles later, so you can lift the caramels out easily once they’re set. This little bit of prep makes the final steps a total breeze and keeps clean-up nice and simple.
Step 2: Combine and Heat Ingredients
Add your heavy cream, granulated sugar, corn syrup, cocoa powder, and salt to a medium saucepan. Stir them together over medium heat, being patient while the sugar fully dissolves. Once you see the mixture become smooth and glossy with no visible grains of sugar, and small bubbles begin appearing, you’re on the right track.
Step 3: Cook to Perfection
Now, attach a candy thermometer to the side of your saucepan—this is a must for Homemade Chocolate Caramels! Let the mixture cook without stirring, carefully watching it reach 245°F (the firm ball stage); this usually takes about 12–15 minutes. Don’t rush it, and keep an eye on the thermometer for that perfect, chewy consistency.
Step 4: Add Butter and Vanilla
Once you’ve hit that target temperature, remove the pan from the heat. Stir in the unsalted butter and vanilla extract, letting the butter melt completely and the vanilla fragrance bloom. This step transforms the caramel, adding extra richness and depth of flavor.
Step 5: Pour and Set
Quickly pour the hot mixture into your prepared baking dish, spreading it evenly if needed. Let it cool on the countertop, undisturbed, for 2–3 hours until it’s fully set and firm to the touch. This is the hardest part—waiting! But it’s worth every patient minute.
Step 6: Cut and Finish
Once the caramel slab is cool and firm, use the parchment overhang to lift it out. Cut it into small squares using a sharp knife. If you love the sweet-and-salty contrast, sprinkle each square with a pinch of flaky sea salt right away for a gourmet finishing touch.
How to Serve Homemade Chocolate Caramels
Garnishes
A final dusting of flaky sea salt is classic, but you could also drizzle melted chocolate, roll the caramels in cocoa powder, or add a sprinkle of crushed nuts for extra texture and flavor. Each garnish highlights a different personality of these Homemade Chocolate Caramels.
Side Dishes
While they’re perfect on their own, serve them alongside an espresso, coffee, or even a glass of dessert wine for a true treat. Fresh berries or a scoop of vanilla ice cream make lovely partners to balance the richness of the caramels.
Creative Ways to Present
Wrap individual caramels in wax paper and tie with string for charming gifts, pile them into a glass jar for a centerpiece, or arrange on a fancy platter with other homemade sweets for an elegant dessert table. However you present them, Homemade Chocolate Caramels are always a showstopper.
Make Ahead and Storage
Storing Leftovers
Keep any leftover caramels in an airtight container at room temperature, and they’ll stay fresh, soft, and delicious for up to two weeks. Layer with parchment or wax paper to prevent sticking, and store away from heat and moisture.
Freezing
If you want to make Homemade Chocolate Caramels far in advance, simply freeze them! Wrap each piece individually, then store in a sealed bag or container. They’ll keep beautifully for up to 2 months, ready to thaw whenever a caramel craving strikes.
Reheating
If your caramels get too firm (especially after refrigeration or freezing), you can gently warm individual pieces in your hands, or let them sit at room temperature for a bit. Avoid microwaving, as this can melt or scorch the chocolate and ruin the texture.
FAQs
Can I make Homemade Chocolate Caramels without corn syrup?
Corn syrup is important here to prevent sugar from crystallizing, giving your caramels that dreamy soft texture. If you must swap, try golden syrup or honey, but results may vary slightly in consistency and flavor.
Why is my caramel grainy?
Grainy caramels usually result from undissolved sugar or stirring too much after the sugar has started boiling. Stir well only at the start, and then let the mixture cook undisturbed until it reaches temperature for the smoothest caramels.
Can I double this recipe?
Absolutely! Just use a larger baking dish (like a 9×13-inch pan), and make sure your saucepan is big enough to handle the increased volume to prevent boil-overs.
Do I need a candy thermometer?
For the best results, yes—a thermometer ensures the caramels reach precisely 245°F for perfect chewiness. Guessing can lead to runny or overly hard caramels, so a thermometer really takes out the guesswork.
How long do Homemade Chocolate Caramels last?
Stored correctly, these caramels will stay delicious for about two weeks at room temperature. For longer storage, freezing is your best bet to keep them fresh and flavorful.
Final Thoughts
If you’ve never tried making Homemade Chocolate Caramels, now’s the time! This recipe combines classic comfort with a chocolatey twist that simply melts hearts and satisfies any sweet tooth. Give it a try and share the love—with friends, family, or just as a special treat for yourself!
Print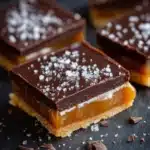
Homemade Chocolate Caramels Recipe
- Total Time: 25 minutes (plus cooling time)
- Yield: 36 pieces 1x
- Diet: Vegetarian
Description
Indulge in the decadent goodness of these homemade Chocolate Caramels. Rich, velvety caramels with a hint of cocoa and a touch of sea salt, these treats are perfect for gifting or enjoying yourself.
Ingredients
Ingredients:
- 1 cup heavy cream
- 1 ½ cups granulated sugar
- ½ cup light corn syrup
- ¼ cup unsweetened cocoa powder
- ¼ teaspoon salt
- 2 tablespoons unsalted butter
- 1 teaspoon vanilla extract
- flaky sea salt for topping (optional)
Instructions
- Prepare the Dish: Line an 8×8-inch baking dish with parchment paper, leaving overhang on the sides.
- Cook the Caramel: Combine cream, sugar, corn syrup, cocoa, and salt in a saucepan. Cook until 245°F.
- Finish the Caramel: Remove from heat, stir in butter and vanilla. Pour into dish and cool.
- Cut and Serve: Once set, cut into squares and sprinkle with sea salt.
Notes
- Wrap individual pieces in wax paper for gifting or storage.
- Store in an airtight container at room temperature for up to 2 weeks.
- Use high-quality cocoa for best flavor.
- Prep Time: 10 minutes
- Cook Time: 15 minutes
- Category: Dessert
- Method: Stovetop
- Cuisine: American
Nutrition
- Serving Size: 1 piece
- Calories: 90
- Sugar: 12g
- Sodium: 30mg
- Fat: 4g
- Saturated Fat: 2g
- Unsaturated Fat: 2g
- Trans Fat: 0g
- Carbohydrates: 14g
- Fiber: 0g
- Protein: 0g
- Cholesterol: 10mg


