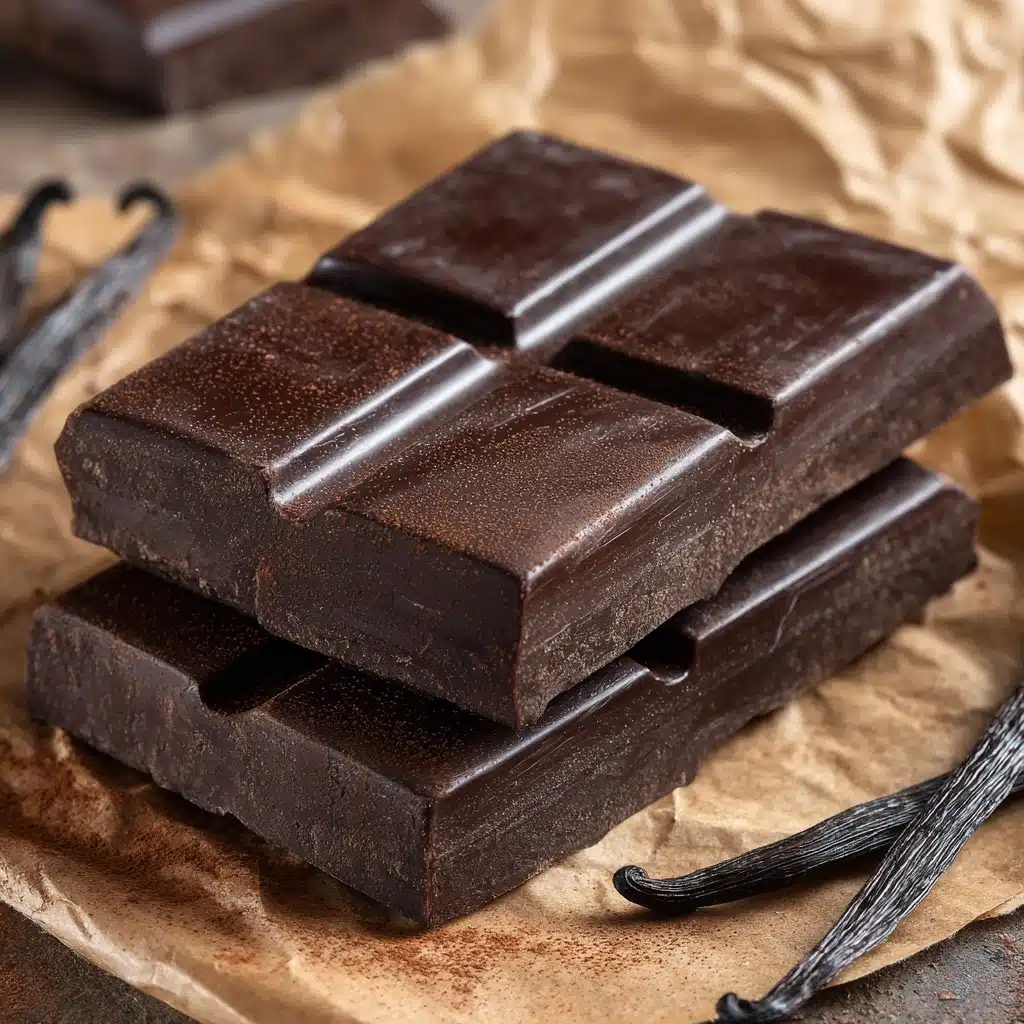
Homemade Chocolate Bars Recipe
Making Homemade Chocolate Bars is a magical experience that transforms simple pantry staples into pure, melt-in-your-mouth indulgence. Imagine velvety chocolate you can break into chunks, richly flavored just the way you love, using only wholesome ingredients and your choice of textures or add-ins. Whether you dream of deep, dark chocolate studded with nuts or creamy, milk-style bars dusted with coconut, these are completely customizable—and far easier than you’d ever expect. The best part? You get all the chocolatey bliss without mystery ingredients or fancy equipment. Once you taste your very first bar, you might never go back to store-bought!
Ingredients You’ll Need
Ingredients You’ll Need
The beauty of these Homemade Chocolate Bars lies in their simplicity—you’ll need just a handful of ingredients, each bringing something unique to the final treat. Fresh cocoa butter creates that signature chocolate snap, while cocoa powder and sweetener let you choose your ideal flavor and texture. The optional add-ins are where you get to infuse creativity!
- Cocoa Butter, chopped: Provides luscious smoothness and that classic melt-in-your-mouth chocolate texture.
- Unsweetened Cocoa Powder: Delivers deep, rich chocolate flavor that really stands out in every bite.
- Powdered Sugar or Maple Syrup: Sweetens things up while keeping the texture glossy and silky. Adjust for your sweet tooth!
- Vanilla Extract: Adds a layer of warmth and complexity that highlights the chocolate notes.
- Pinch of Salt: Just a little salt balances and enhances all the chocolatey goodness.
- Optional Add-ins (chopped nuts, dried fruit, shredded coconut, sea salt flakes): Use these to add crunch, chew, or bursts of extra flavor, making each bar your very own creation.
How to Make Homemade Chocolate Bars
Step 1: Melt the Cocoa Butter
Start by chopping your cocoa butter into small, even pieces for easy melting. Place them in a double boiler or a heatproof bowl set over a saucepan of barely simmering water. Gently stir as the cocoa butter melts until it’s completely clear and fluid—this ensures your Homemade Chocolate Bars will have that professional, glossy finish and a satisfying snap.
Step 2: Whisk in Flavor and Sweetness
Once the cocoa butter is totally melted, take the bowl off the heat. Quickly whisk in the unsweetened cocoa powder, your chosen sweetener (adjusting to taste), the vanilla extract, and a pinch of salt. Whisk vigorously! The goal is a super-smooth, shiny chocolate base with zero lumps and a balanced, aromatic flavor.
Step 3: Customize Your Bars
Now comes the fun part—personalizing! If the mood strikes, fold in anything your heart desires: toasted nuts for crunch, chopped dried cherries for a tangy bite, shredded coconut for a tropical twist, or even a swirl of espresso powder for grown-up sophistication. Your kitchen, your rules.
Step 4: Pour and Chill
Pour the luscious chocolate mixture into your favorite silicone molds or a parchment-lined loaf pan for easy removal. Tap the molds gently on the countertop to pop any air bubbles. Sprinkle with a bit of flaky sea salt or your favorite toppings if you’d like. Now just pop the pan in the refrigerator for 1 to 2 hours, until beautifully set and ready to slice!
Step 5: Enjoy and Store
After the bars are firm, carefully release them from the molds or lift and cut from the pan. Admire that gleam! Store your Homemade Chocolate Bars in an airtight container, nestling them in the fridge or a cool, dry spot to keep them fresh and perfect until you’re ready for a sweet moment.
How to Serve Homemade Chocolate Bars
Garnishes
Dress up your Homemade Chocolate Bars with jewel-like dried cranberries, toasted coconut flakes, crushed pistachios, or a sprinkle of sea salt. Each garnish adds its own pop of color and flavor, turning every bar into a personalized masterpiece. For a more decadent finish, drizzle with a little melted white or dark chocolate before chilling.
Side Dishes
Chocolate loves company! Serve your bars alongside fresh berries, a steaming mug of coffee, or a glass of almond milk. They make a stunning dessert board addition, pairing wonderfully with cheese, fruit, and even a splash of red wine for a grown-up twist.
Creative Ways to Present
Gift wrap your bars in parchment and colorful ribbon for a thoughtful homemade present, or break them into rustic shards and pile high in a decorative jar. For a party, arrange bite-size pieces on a platter with a variety of toppings and let guests mix and match their favorite flavors.
Make Ahead and Storage
Storing Leftovers
Keep your Homemade Chocolate Bars fresh by storing them in an airtight container, ideally in the refrigerator or a cool pantry. They’ll stay delicious for up to two weeks. If your kitchen runs warm, fridge storage is best to prevent melting.
Freezing
Yes, Homemade Chocolate Bars freeze beautifully! Wrap each bar tightly in parchment or plastic wrap, then seal in a freezer-safe bag or container. They’ll keep for up to 3 months; just thaw in the fridge for about an hour before enjoying.
Reheating
Since these bars are best enjoyed cold or at room temperature, there’s no need to reheat. If your bars get a bit too firm in the fridge, simply let them rest at room temperature for a few minutes to reach that perfect, silky bite.
FAQs
Can I make milk chocolate instead of dark?
Absolutely! For a creamier milk chocolate, stir in 1/4 cup milk powder after melting your cocoa butter. It’ll transform the texture and mellow out the chocolate’s intensity.
Which sweetener works best?
It’s all about your taste buds! Powdered sugar keeps the bars traditional and smooth, while maple syrup gives a subtle caramel note. Taste as you go and choose what you love best.
Can I add flavors like orange or mint?
Definitely—Homemade Chocolate Bars are perfect for creative flavor adventures! A few drops of peppermint extract, a pinch of espresso powder, or some finely grated orange zest can turn each batch into a brand-new treat.
Why does my chocolate sometimes look spotty?
This usually happens if moisture sneaks in, or the bars cool too slowly. Make sure everything is dry before you start and place the bars straight into the fridge to set for that flawless, glossy finish.
Do I need a double boiler?
Not necessarily! If you don’t have a double boiler, just place a heatproof bowl over a saucepan with simmering water. The key is gentle, indirect heat to melt the cocoa butter smoothly—no scorching allowed!
Final Thoughts
There’s something truly special about biting into a chocolate bar you made yourself, with the flavors and textures you love most. So go ahead—make a batch of Homemade Chocolate Bars, get creative with your add-ins, and savor every handmade piece. Once you taste them, I guarantee you’ll be craving your own homemade creations every time!
Print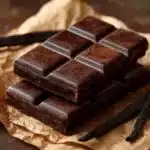
Homemade Chocolate Bars Recipe
- Total Time: 15 minutes (plus chilling time)
- Yield: 4 bars 1x
- Diet: Vegan
Description
Indulge in the rich, decadent flavors of homemade chocolate bars with this easy vegan recipe. Customize your chocolate bars with your favorite add-ins for a personalized touch.
Ingredients
Main Ingredients:
- 1 cup cocoa butter, chopped
- 1 cup unsweetened cocoa powder
- ½ cup powdered sugar or maple syrup (adjust to taste)
- 1 teaspoon vanilla extract
- pinch of salt
Optional Add-Ins:
- chopped nuts
- dried fruit
- shredded coconut
- sea salt flakes
Instructions
- Melt Cocoa Butter: In a double boiler or heatproof bowl, melt the cocoa butter over simmering water until fully liquefied.
- Mix Ingredients: Remove from heat and whisk in cocoa powder, sweetener, vanilla extract, and salt until smooth.
- Add Optional Ingredients: Fold in optional add-ins like nuts or dried fruit.
- Pour and Set: Pour mixture into molds, tap out air bubbles, and refrigerate for 1–2 hours until set.
- Store: Once firm, store chocolate bars in an airtight container in the fridge or a cool pantry.
Notes
- For milk chocolate, add ¼ cup milk powder after melting cocoa butter.
- Customize flavors with peppermint extract, espresso powder, or orange zest.
- Keep bars cool as they melt easily.
- Prep Time: 10 minutes
- Cook Time: 5 minutes
- Category: Dessert
- Method: No-Bake
- Cuisine: Global
Nutrition
- Serving Size: 1 bar
- Calories: 280
- Sugar: 12g
- Sodium: 20mg
- Fat: 24g
- Saturated Fat: 15g
- Unsaturated Fat: 8g
- Trans Fat: 0g
- Carbohydrates: 16g
- Fiber: 4g
- Protein: 2g
- Cholesterol: 0mg


